Diagzone Xdiag Subscription Renew, LAUNCH LTR-01 RF Sensor, Thinkdiag Renew , Scania SDP3 Installation

The Tech 2 is the same tester GM Technicians use to diagnose GM vehicles. The Vetronix Tech 2 comes with Authentic GM software and provides support for on-board diagnostics on all GM systems 1992 thru 2014. But how to use the Vetronix Tech 2 Scanner ?
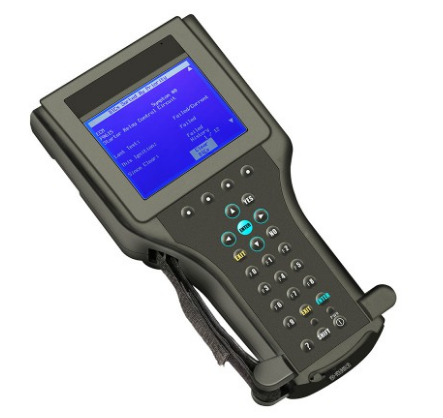
Please check the steps as following :
1. Turn on the power, the instrument enters the self-check state, and the screen performs
How useful was this post?
Click on a star to rate it!
Average rating / 5. Vote count:
Please keep this link if you copy the post!
Related Posts
How to Use G-Scan3 do DPF Regeneration for Chevrolet Orlando 2012
2020.10.11
How to use Launch X431 IMMO to add a new key for Porsche Cayenne 2011-2017
2024.01.28
How to Add New Keys for Dodge and Chrysler by Yourself (No Need Tool)
2019.02.24
What’s the difference between JMD Handy Baby II and Handy Baby First Gener...
2019.02.28
How to Fix
2024.01.28
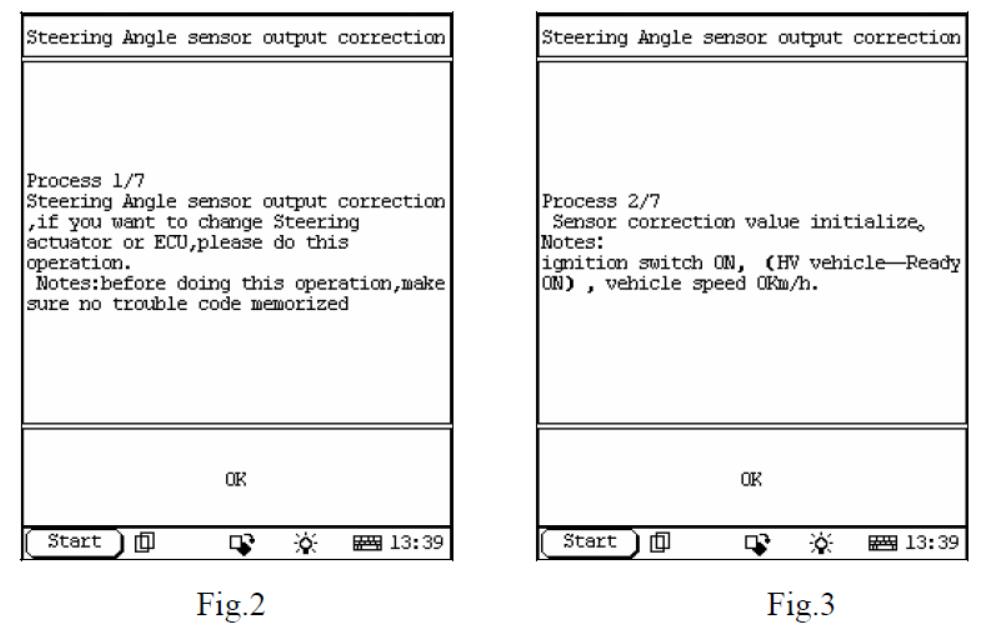
Toyota Steering Angle Sensor Output Correction by Launch X431
2019.05.13
How to Cheaply Add Horsepower with an ECM Flash
2024.01.28
How to Associate microPODs to Service Technicians at CJDR + FA Dealerships
2019.06.17
New Holland CX8080 Elevation Lower Cleaning Shoe Repair Kits: Solving Cracks and...
2024.01.28
Volvo PTT Premium Tech Tool PTT 2.7 2.6 All Version Free Download
2019.02.24