This article show a guide on how to force flash Autocom CDP+ by USB.Hope it helps!
Autocom CDP+ Related:
Autocom DELPHI DS150E Cars & Trucks Software Free Download
How to Repair Autocom CDP Pro Cannot Communicate with Vehicle
DELPHI DS150E Reset Service Light for VW Polo 2005
Procedures:
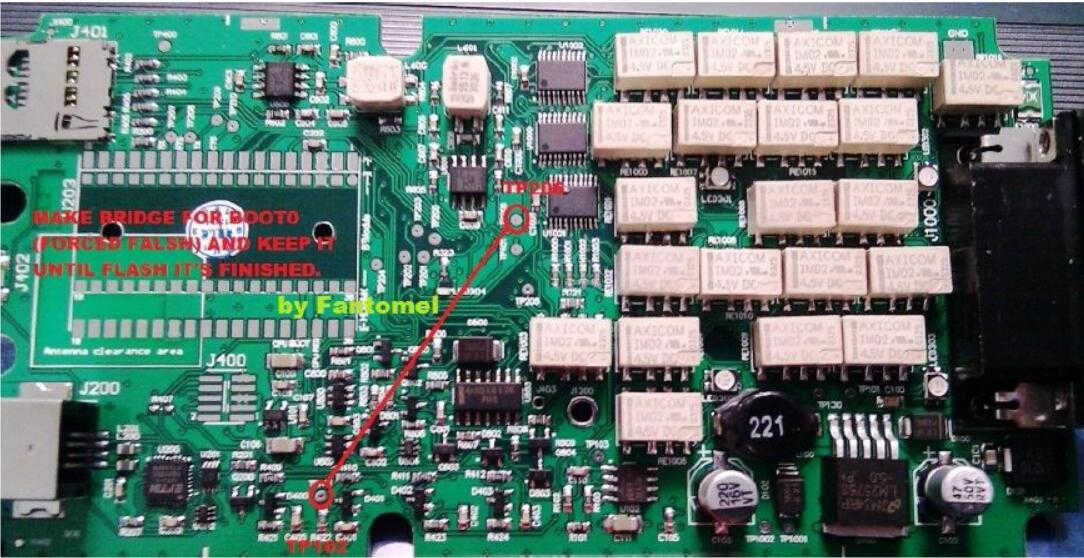
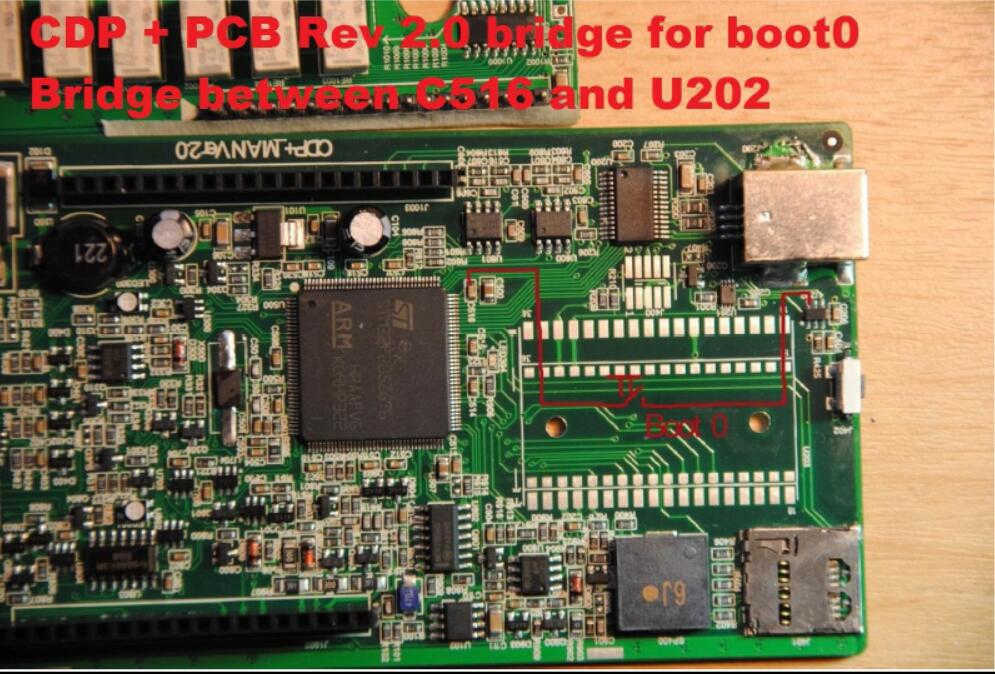
1MAKE BRIDGE FOR BOOT0 – MCU IN BOOT MODE (LOOK AT PICTURES).Keep it until flash procedure ends. This is in fact connection of legs 108 and 138 from STM32F2XX processor. Some
units have different PCB so you need to solder directly to the legs and make a connection between them or find test points with multimeter.
2Now you need to install and run “Flash Loader Demonstrator”.
3Connect your unit to USB and to power supply (OBD). It will light red this means boot0 active.
At the Flash Loader Demonstrator choose COM port nr that VCI is installed (check in device manager) click NEXT- sometimes you need couple times try to have succesful connection.
Program will ask to erase content of MCU because it is secured.
When you will have connection with MCU you need choose type of MCU 1024K and on
next page “Download to device” check “global erase” and chose the firmware you want to put on your cdp+.
Now press NEXT and wait about 10min.After this your CDP+ will work without problems.
CDP+ SINGLE BOARD – ENTER FORCED FLASH BOOT0 – LINK TP102 WITH TP206 ON THIS PCB
CDP+ REV
How useful was this post?
Click on a star to rate it!
Average rating / 5. Vote count:
Please keep this link if you copy the post!