Diagzone Xdiag Subscription Renew, LAUNCH LTR-01 RF Sensor, Thinkdiag Renew , Scania SDP3 Installation
This instruction show you guide on how to remove and install equipment carrier for MTU 4000 series 12-14v diesel engine.
Related Contents:
MTU DiaSys 2.73 2.72 Engine Diagnostic Software Free Download
Procedures:
Removing equipment carrier
Screw two eyebolts (arrows) into equipment carrier.
Attach equipment carrier to crane with ropes and tension ropes equally.
Remove plugs (1) and (2).
Remove hex screws through idler gear bores.
If the screws are inaccessible, rotate crankshaft accordingly.
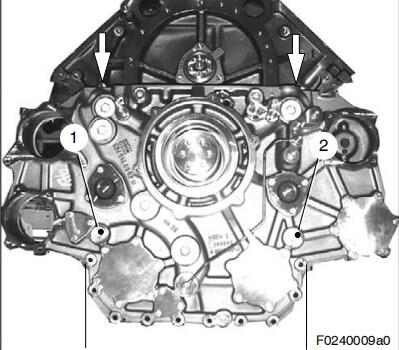
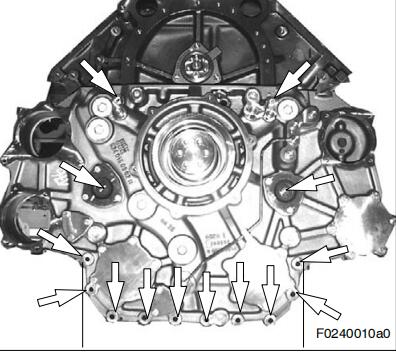
Mark all screws on equipment carrier circumference (arrows) (differing lengths) and remove.
WARNING
Suspended load.
Risk of injury!
Only use lifting device provided by manufacturer and observe lifting instructions.
Never stand beneath a suspended load.
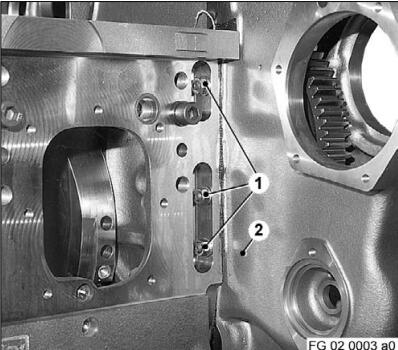
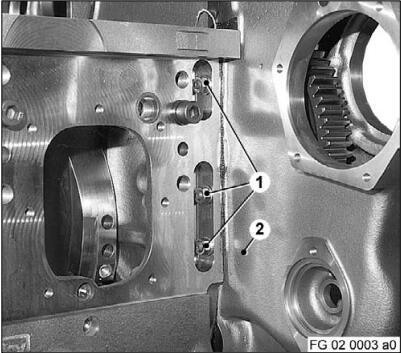
Release nuts (1), left and right sides of crankcase and remove with washers.
Carefully push equipment carrier (2), with the ropes pretensioned, in direction of free end until it is freed from crankcase.
Remove O-rings.
MTU DiaSys 2.73 Diagnostic Software Installation Service
Install equipment carrier
Note: Ensure that components and tools are particularly clean.
Install intermediate gears and axles.
Install delivery valve and pressure reduction valve.
Coat alignment jig (2) and guide bush with engine oil and install with hex screws (1) on equipment carrier.
Note: Pay attention to
How useful was this post?
Click on a star to rate it!
Average rating / 5. Vote count:
Please keep this link if you copy the post!
