Diagzone Xdiag Subscription Renew, LAUNCH LTR-01 RF Sensor, Thinkdiag Renew , Scania SDP3 Installation
This function requires all connectors to be disconnected from all electrohydraulic valves on the tractor.You are advised to use this function when adding or removing:
One electrohydraulic valve at the rear of the tractor, or
The electrohydraulic valves at the front of the tractor, or
The front linkage electrohydraulic valve.
Preparations:
AGCO EDT 2024
AGCO 2×4 CANUSB
Important:
For modifications to the hydraulic configuration, the label codes for the linkage controller must be updated.
Procedure
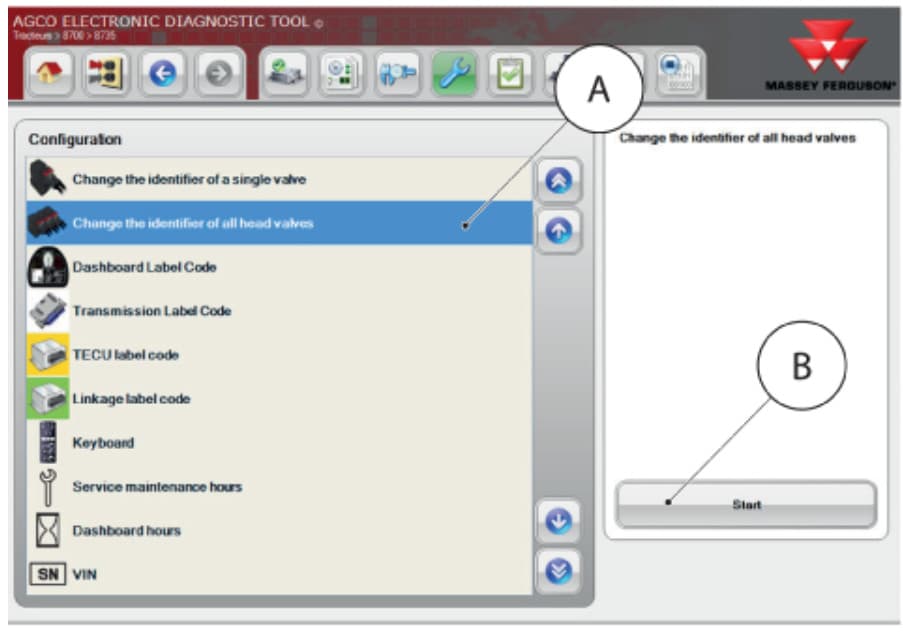
1 Select “Change the identifier of all head valves” A then “Start” B
2 Select “the maximum number valve connected on the bus” C

3 Select the maximum number of electrohydraulic spool valves at the front of the tractor D

No electrohydraulic spool valves at the front = 0
With 1 electrohydraulic spool valve at the front = 1
With 2 electrohydraulic spool valves at the front = 2
4 Specify whether the tractor has a front linkage E
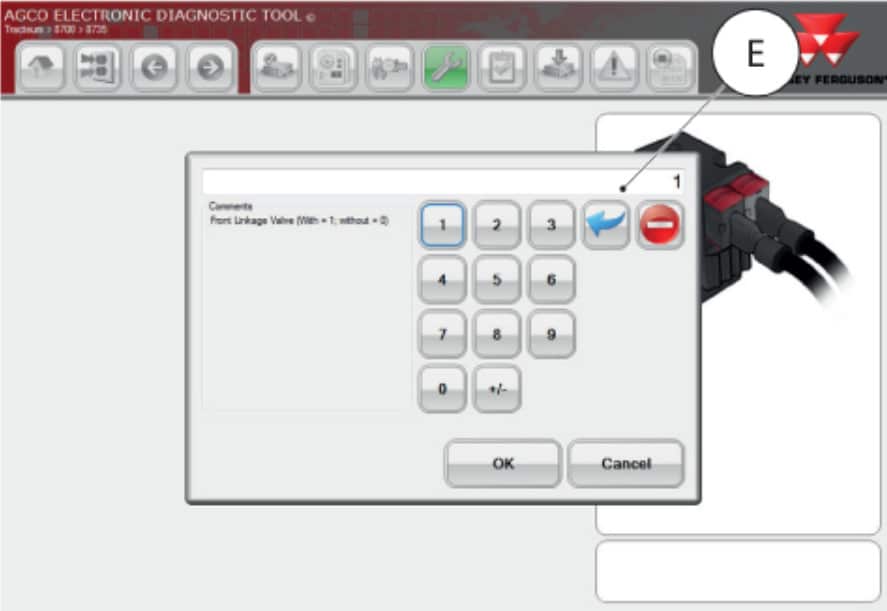
Without front linkage = 0
With front linkage = 1
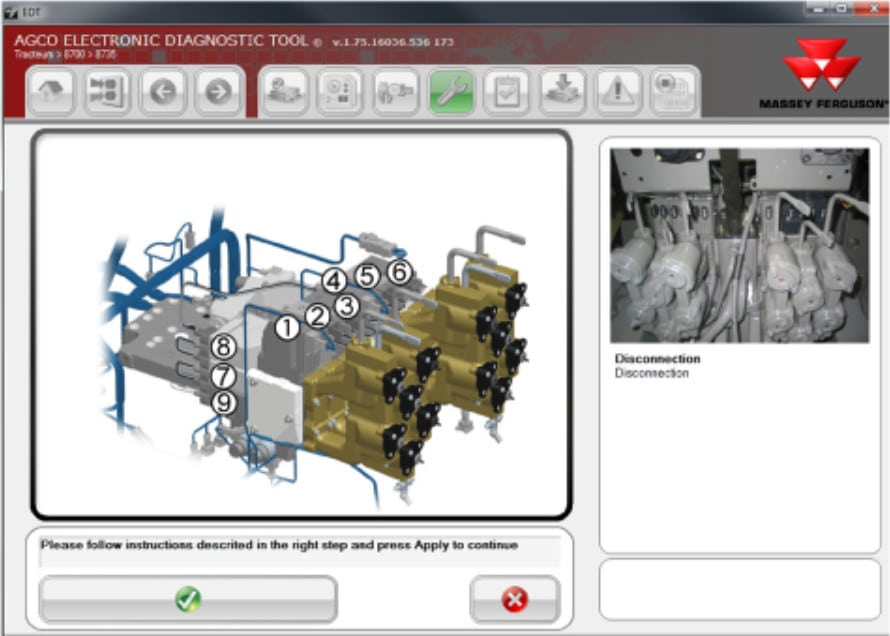
5 Disconnect all electrohydraulic valves from the tractor then “Validate” F
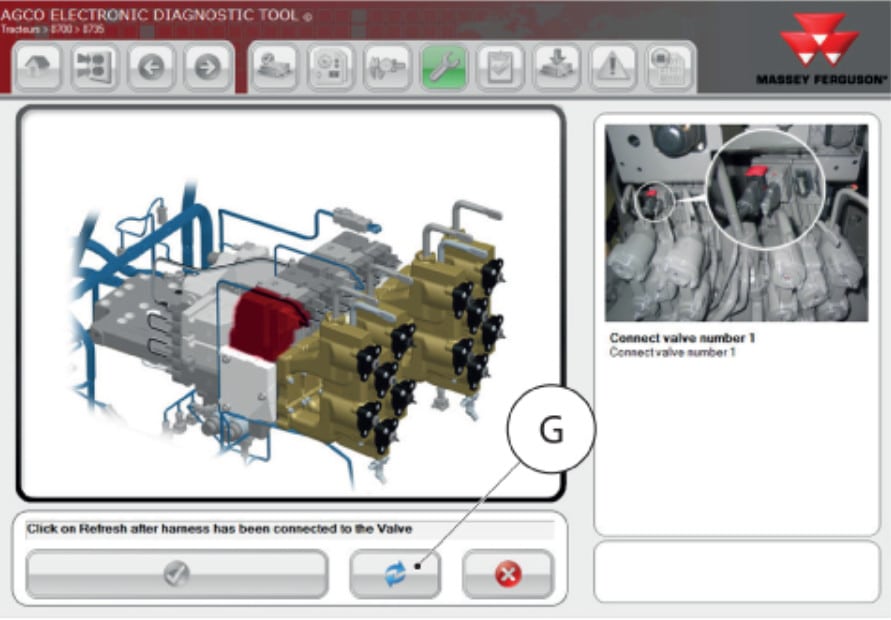
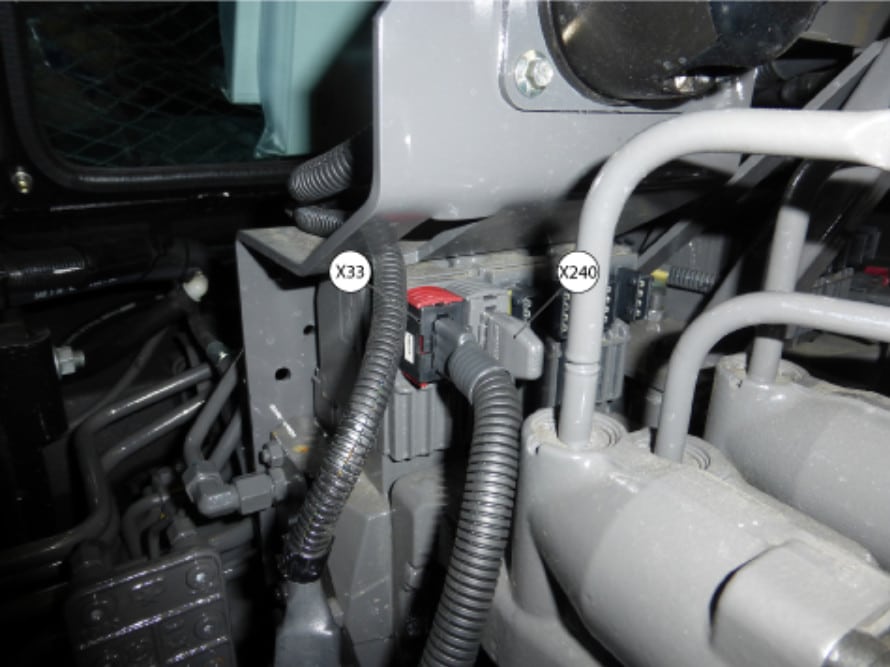
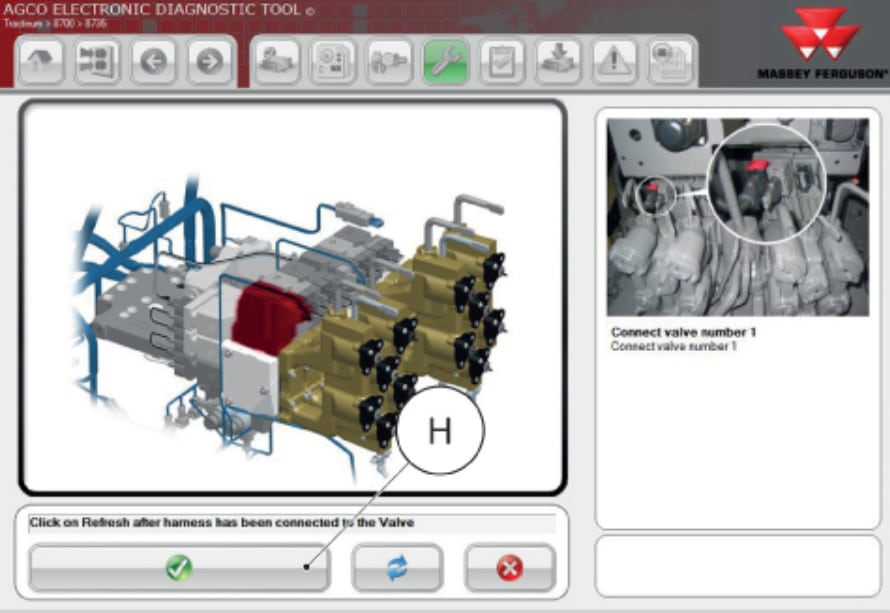
6 Connect rear electrohydraulic spool valve no. 1 using connector X33 – Connector for the electrohydraulic spool-valves supply and X240 – Termination connector for an electrohydraulic spool valve (120-ohm resistor).Select “Refresh” G once the connection to valve no. 1 has been established
7 The following message appears: “Auxiliary spool valve no. 1 is correctly configured”. Press “Validate” H to move on to the next electrohydraulic valve.When changing the identification number of the valve, it may be necessary to switch off the ignition.
8 Repeat the above configuration steps for all the valves, following the procedure set out in the diagnostic tool and the sequence of electrohydraulic spool valves.
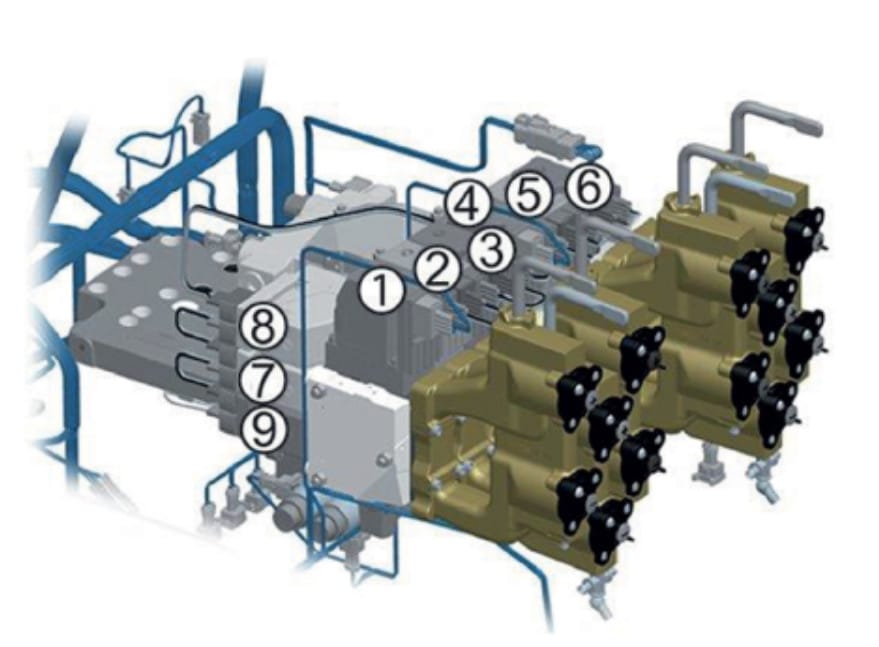
Rear spool valve no. 1 = 1
Rear spool valve no. 2 = 2
Rear spool valve no. 3 = 3
Rear spool valve no. 4 = 4
Rear spool valve no. 5 = 5
Rear spool valve no. 6 = 6
Front spool valve no. 1 = 7
Front spool valve no. 2 = 8
Front linkage valve = 9
9 Once the procedure for configuring the valves is complete, reconnect all the electrohydraulic spool valves for the tractor to their respective connectors/harnesses
AGCO EDT Electronic Diagnostic Tool 1.128 Diagnostic Software
How useful was this post?
Click on a star to rate it!
Average rating / 5. Vote count:

Some Friends don't know how to activate win7, when they receive the diagnostic software with win7 sytem. http://www.chinaobd2.com/upload/software/win7activation.zip download this Read more

Please ensure that you choose computer systems that meet our requirements for the installation. You will find adetailed listing in Read more

Frequent oil changes are perhaps the most important procedure you can do to maintain and prolong the life of your Read more

This article show a guide on how to use G-scan2
Please keep this link if you copy the post!