Diagzone Xdiag Subscription Renew, LAUNCH LTR-01 RF Sensor, Thinkdiag Renew , Scania SDP3 Installation
Here is the instruction show you guide on how to use HINO DX3 truck diagnostic software Inspection menu function.
Related Contents:
Nexiq USB2 Diagnostic Adapter
2023.03 HINO Diagnostic Explorer DX3/DX2 Diagnostic Software Free Download
HINO Trucks EPC Electronic Parts Catalog 2018?2016 Free Download
Procedures:
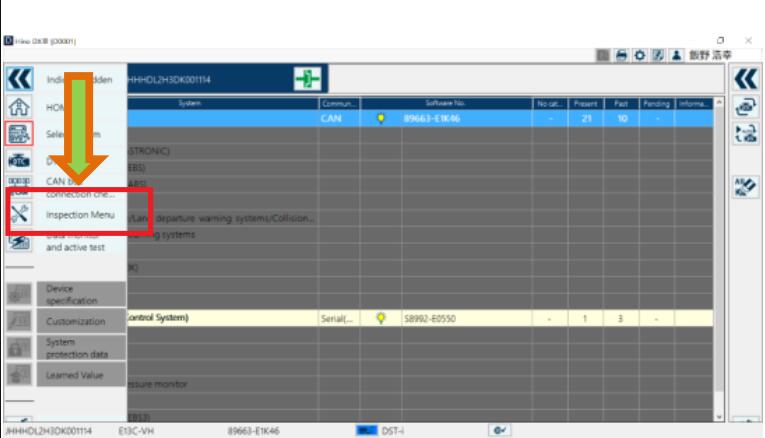
1.Select Inspection Menu on the System selection screen.
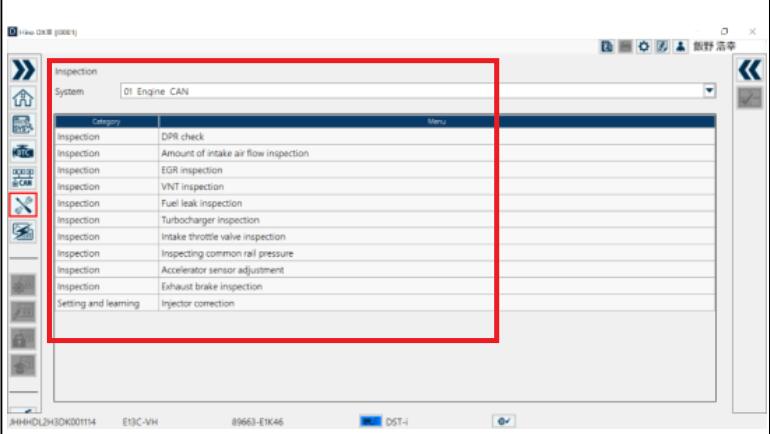
2.When you select a system, a list of Inspection Menu items set for the system is displayed.
In some systems, Setting/Learning items are also displayed.
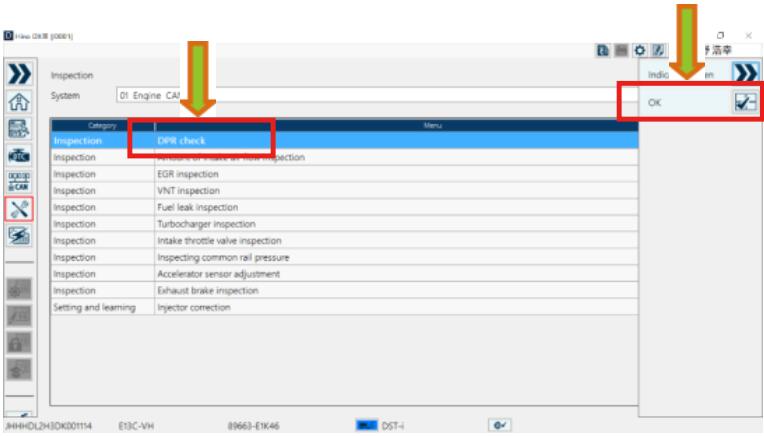
3.Select the Inspection Menu item you would like to execute, double-click it, or click or press the [OK] button.
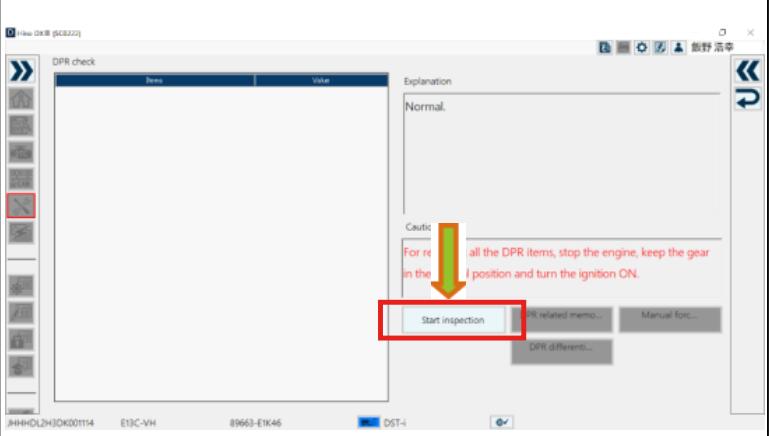
4.Click or press the [Start Inspection] button to start inspection.
Implement inspection according to Explanation and Caution.
5.Click or press the [End Inspection] button to exit the inspection.
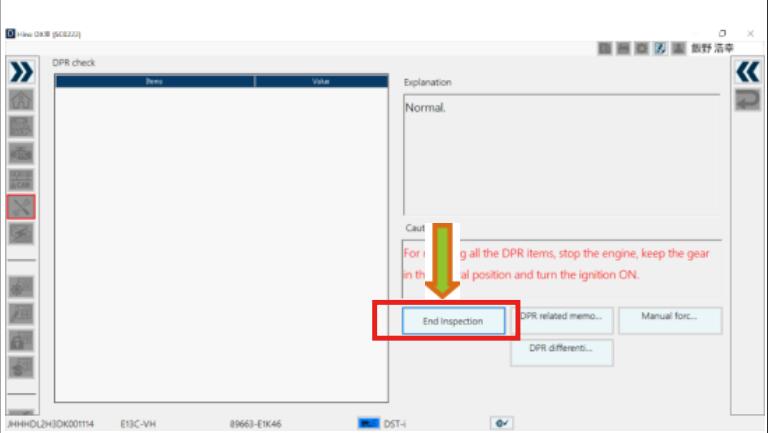
6.Click or press the [Back] button to return to a list of Inspection Menu items.
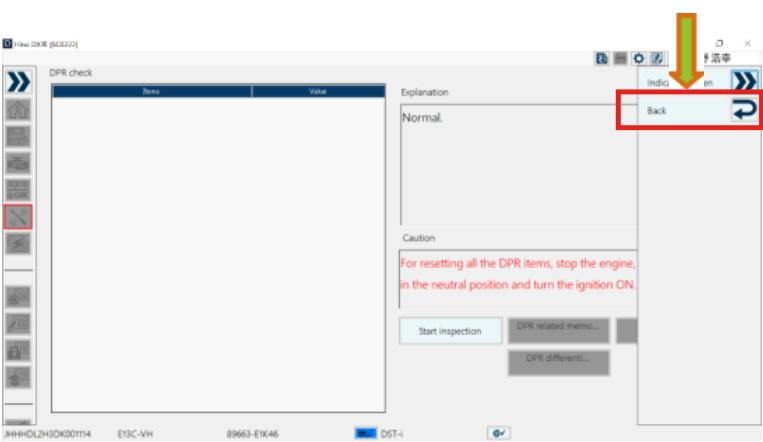
Setting/Learning
1.Select Inspection Menu on the System selection screen.
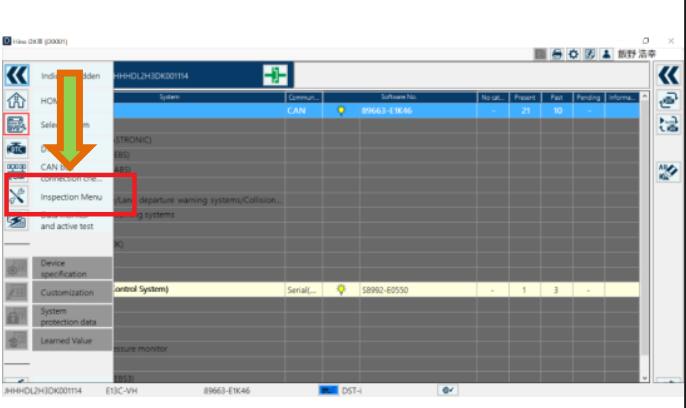
2.Select a system to display a list of the Setting/Learning menu items that were set in the system.
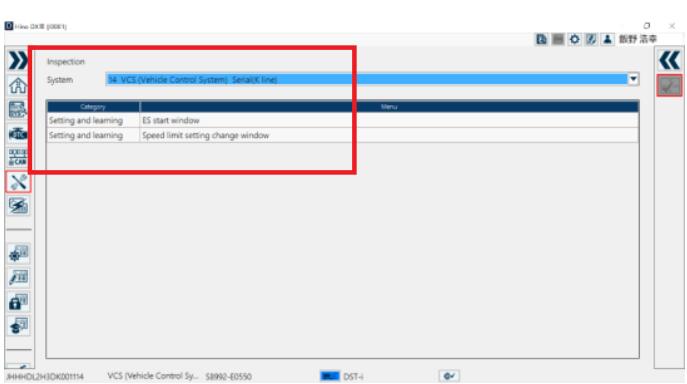
3.Select a Setting/Learning Menu item that you would like to execute,double-click it, or click or press the [OK] button.
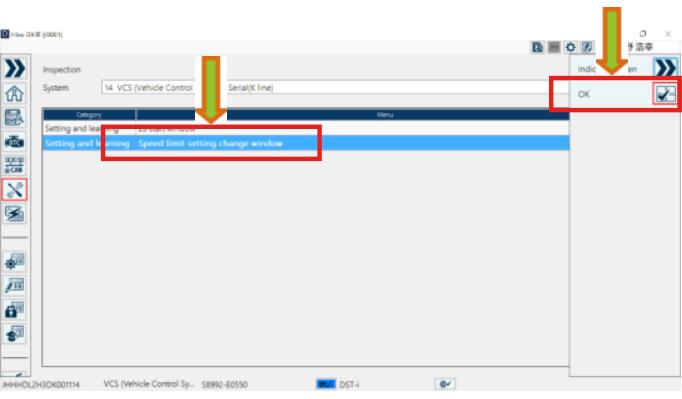
4.Click or press the [Start] button to start Setting/Learning.
Implement inspection according to Explanation and Caution.
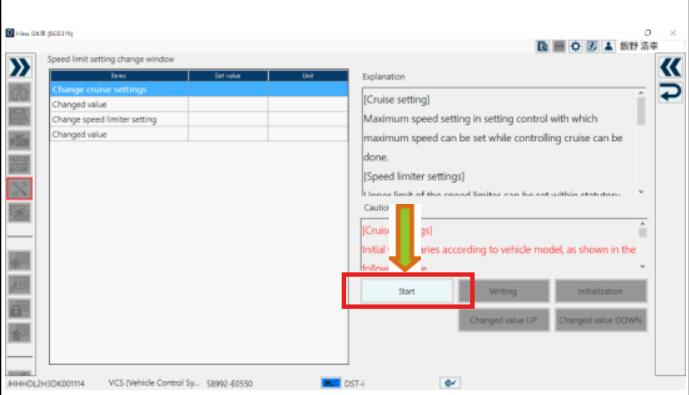
5.Click or press the [Close] button to exit the Setting/Learning.
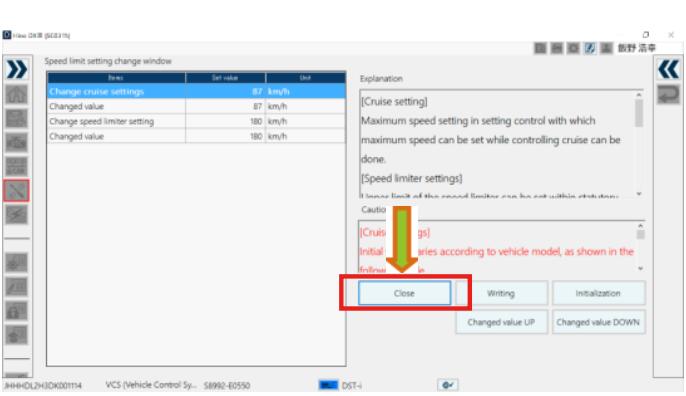
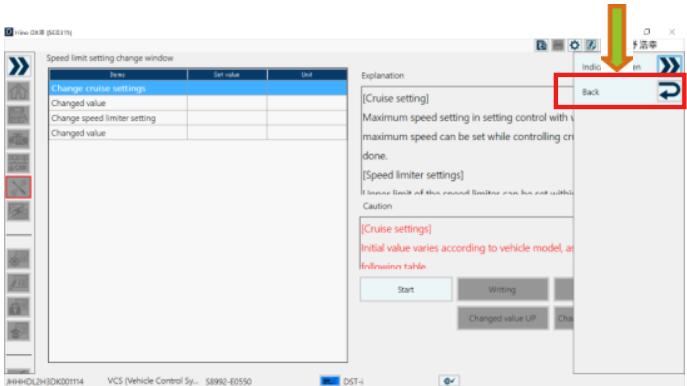
6.Click or press the [Back] button to return to a list of the
Setting/Learning menu items that were set in the system.
More case for HINO please refer to:HINO Trouble Repair.
How useful was this post?
Click on a star to rate it!
Average rating / 5. Vote count:
Please keep this link if you copy the post!
