Diagzone Xdiag Subscription Renew, LAUNCH LTR-01 RF Sensor, Thinkdiag Renew , Scania SDP3 Installation
If your Mercedes has the rain/light sensor for the windshield wipers and it starts acting up, changing out the sensor is quick and easy. The sensor is attached to the front windshield and can be replaced without removing the windshield.
The sensor determines rain by sending an infrared light from the transmitter in the sensor up into the windshield. If the windshield is clear almost all of the light will be reflected back to the sensor. If there is rain on the windshield then some of the light will be refracted and spread by the rain drops and cause a low light signal back to the sensor. The more rain the more light that gets dispersed. The low light is measured directly by the amount of light intensity falling on the sensor. Start by shutting off the car and removing the key from the ignition.
Applies to:C350 (2007-14), SLK350 (2004-14), CLS350 (2004-14), CLK350 (2005-14), E350 (2005-14), S350 (2005-14), SL350 (2005-14), R350 (2006-14), ML350 (2006-14), Viano (2005-14), Sprinter (2006-14), CLC350 (2008-14), GLK350 (2008-12), C180 (2007-14), C200 (2007-14), C230 (2007-14), C250 (2007-14), C280 (2007-14), C300 (2007-14), C320 (2007-14)
Parts Required: Sensor
Hot Tip: Be careful working around the windshield
Performance Gain: Working rain and low light sensor
Complementary Modification: New wiper blades
Procedures:
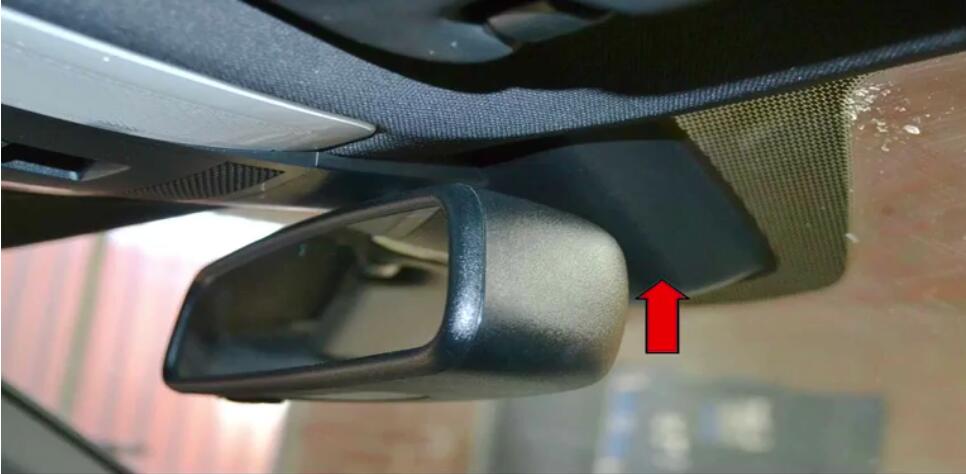
The sensor is located under a plastic protective cover behind the rear view mirror and attached to the windshield (red arrow).
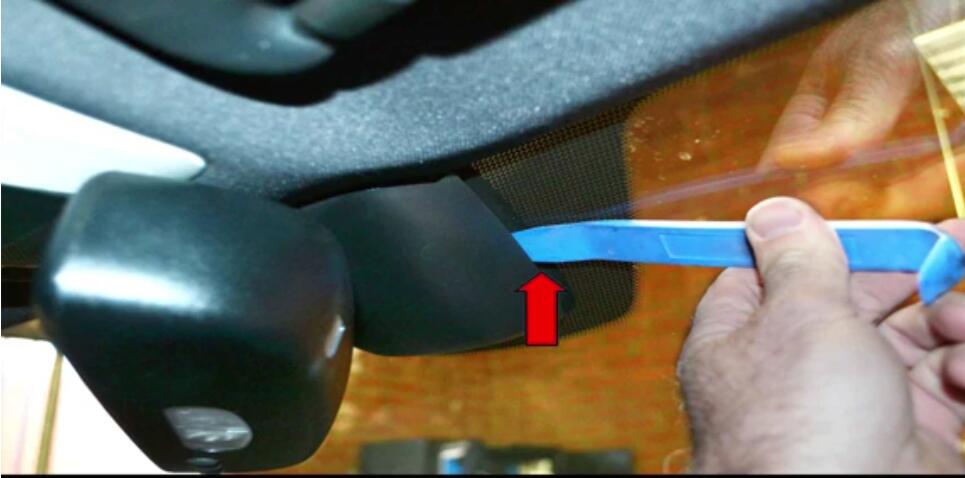
Use a trim removal tool and gently pry the cover off the mount attached to the windshield (red arrow)
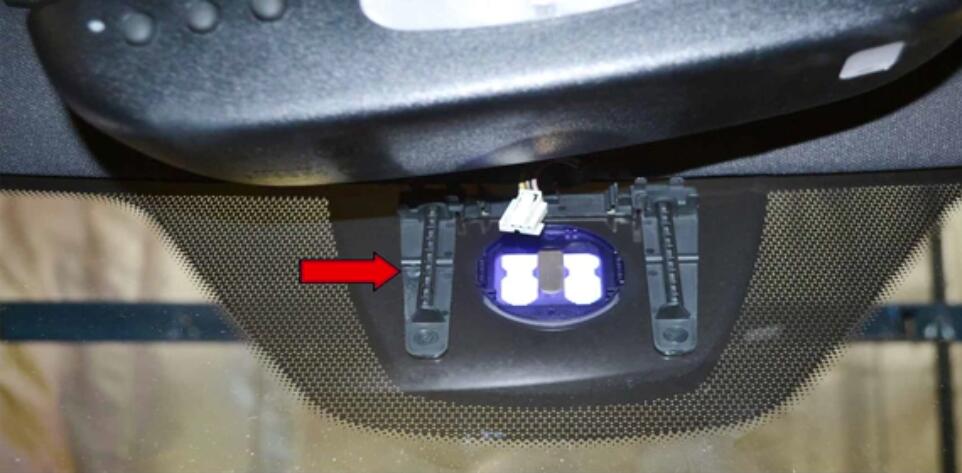
This photo illustrates the plastic mount the cover is attached to (red arrows)

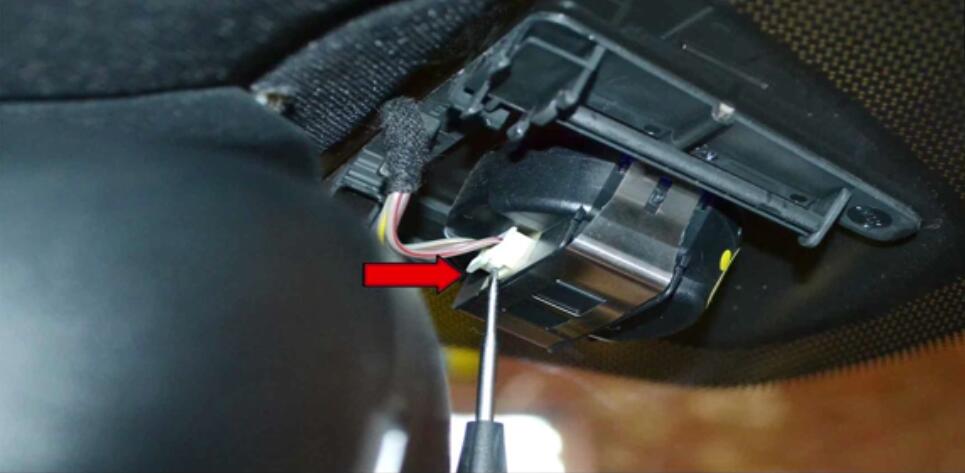
Use a small flathead screwdriver and release the plastic tab (red arrow) and pull the wiring connection from the sensor.
Using the small flathead screwdriver very carefully pry the two clips out (red arrow,one shown) that hold the sensor to the windshield.Gently remove the sensor.

This photo illustrates the windshield with the sensor removed so you can see what parts remain mounted to the glass (red arrow)
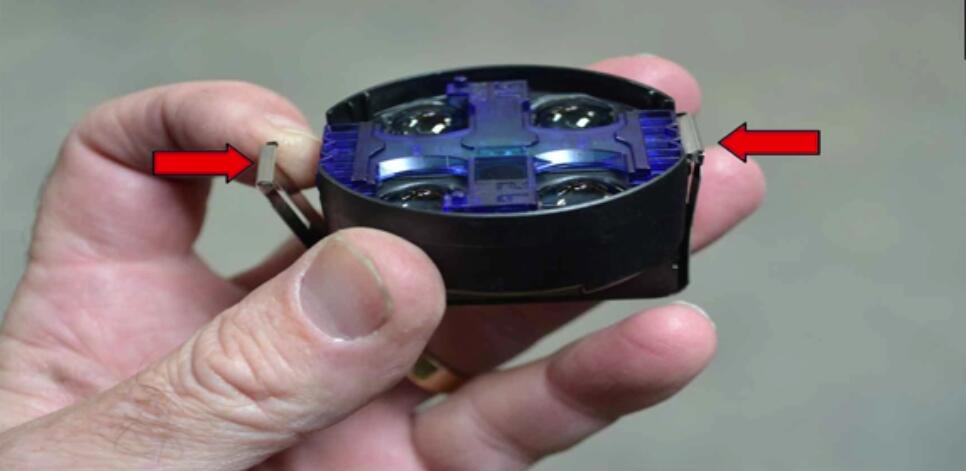
The two metal clips on the sensor are delicate (red arrows) so use care when removing and installing them.Installation is the reverse of removal.
Done!
How useful was this post?
Click on a star to rate it!
Average rating / 5. Vote count:

Some Friends don't know how to activate win7, when they receive the diagnostic software with win7 sytem. http://www.chinaobd2.com/upload/software/win7activation.zip download this Read more

Please ensure that you choose computer systems that meet our requirements for the installation. You will find adetailed listing in Read more

Frequent oil changes are perhaps the most important procedure you can do to maintain and prolong the life of your Read more

This article show a guide on how to use G-scan2
Please keep this link if you copy the post!