Diagzone Xdiag Subscription Renew, LAUNCH LTR-01 RF Sensor, Thinkdiag Renew , Scania SDP3 Installation
This instruction show you guide on how to remove and install inverter for HINO 155,155h,195,195h series equipped with J05E engine.
Related Contents:
Nexiq USB-Link 3 Diagnostic Adapter
2025.03 HINO Diagnostic Explorer DX3/DX2 Diagnostic Software Free Download
HINO Trucks EPC Electronic Parts Catalog 2018 2016 Free Download
REMOVING THE INVERTER
1 REMOVING THE PCU
Reference: HYBRID, HYBRID SYSTEM, PCU, REPLACEMENT,
REMOVING THE PCU
2 REMOVING THE UNDER COVER
Reference: HYBRID, HYBRID SYSTEM, HV BATTERY,
REPLACEMENT, REMOVING THE HV BATTERY ASSEMBLY
3 DISCONNECTING THE BOTTOM OF PCU
Reference: HYBRID, HYBRID SYSTEM, HV BATTERY,
REPLACEMENT, REMOVING THE HV BATTERY ASSEMBLY
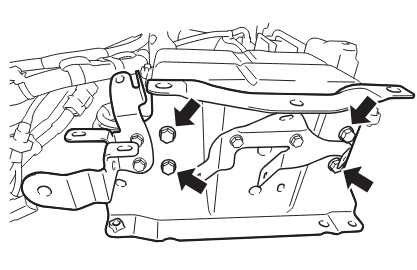
4 REMOVING THE INVERTER
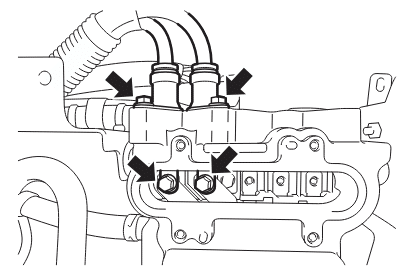
(1) Remove bolts (4 pcs.) and detach the main battery cable.
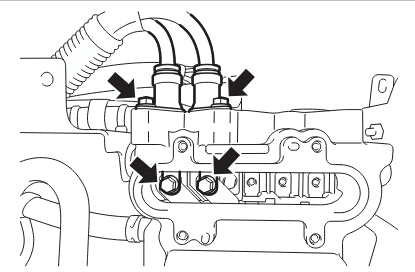
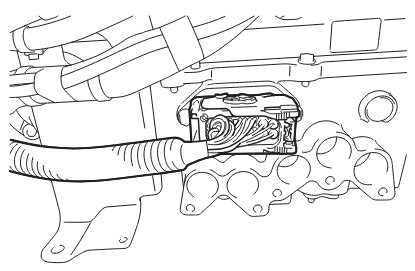
Disconnect the connector.
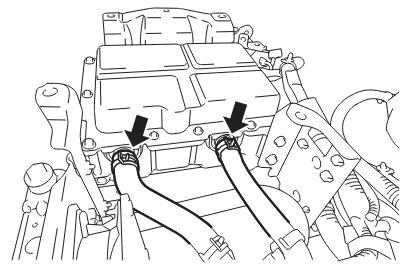
(3) Remove the clips (2 pcs.) and disconnect the hoses (2 pcs.).
! CAUTION
Use a tray or something similar to catch the coolant.
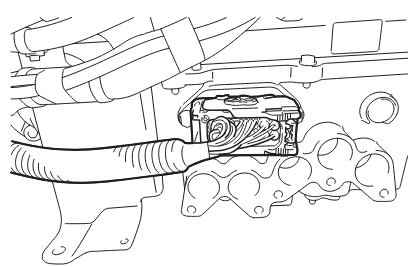
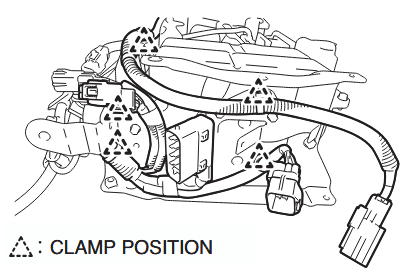
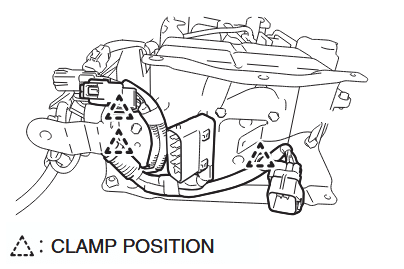
(4) Cut the harness clamp (5 locations) from the inverter bracket No.1.
(5) Unfasten the bolts (4 pcs.) to remove the inverter bracket No.1 from the inverter.
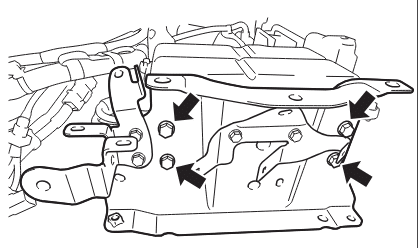
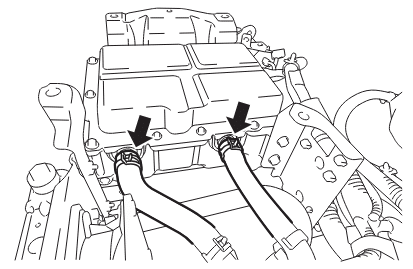
(6) Remove the bolts (4 pcs.) and remove the inverter bracket
No.2 and inverter bracket No.3 from the inverter.
MOUNTING THE INVERTER
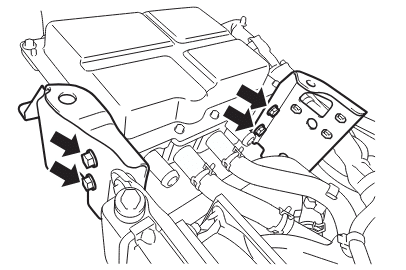
1 MOUNTING THE INVERTER
(1) Mount the inverter bracket No.2 and inverter bracket No.3 to the inverter with the bolts (4 pcs.).
Tightening Torque:
19.0 N·m {194 kgf·cm, 14.0 lbf·ft}
(2) Mount the inverter bracket No.1 to the inverter with the bolts (4 pcs.).
Tightening Torque:
19.0 N·m {194 kgf·cm, 14.0 lbf·ft}
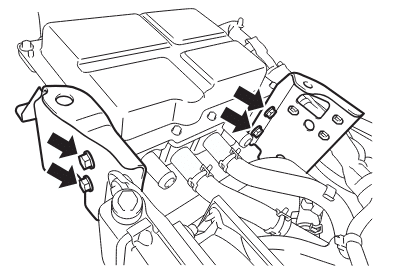
(3) Connect the harness clamp (3 pcs.) to the inverter bracket No. 1.
(4)Connect the hoses (2 pcs.) and attach the clamps (2 pcs.).
Connect the connector.
(6) Connect the main battery cable with the bolts (4 pcs.).
Tightening Torque:
9 N·m {92 kgf·cm, 6.6 lbf·ft}(Cable side)
7.2-10.8 N·m {73-110 kgf·cm, 5.3-8.0 lbf·ft}(Terminal side)
! CAUTION
Be sure to tighten on the cable side first.
2 ADDING COOLANT
Reference: HYBRID, HYBRID SYSTEM, COOLANT, REPLACEMENT, ADD COOLANT
3 MOUNTING THE BOTTOM OF PCU
Reference: HYBRID, HYBRID SYSTEM, HV BATTERY,
REPLACEMENT, MOUNTING THE HV BATTERY ASSEMBLY
4 MOUNTING THE UNDER COVER
Reference: HYBRID, HYBRID SYSTEM, HV BATTERY,
REPLACEMENT, MOUNTING THE HV BATTERY ASSEMBLY
5 MOUNTING THE PCU
Reference: HYBRID, HYBRID SYSTEM, PCU, REPLACEMENT,MOUNTING THE PCU
More case for HINO please refer to:HINO Trouble Repair
How useful was this post?
Click on a star to rate it!
Average rating / 5. Vote count:

Some Friends don't know how to activate win7, when they receive the diagnostic software with win7 sytem. http://www.chinaobd2.com/upload/software/win7activation.zip download this Read more

Please ensure that you choose computer systems that meet our requirements for the installation. You will find adetailed listing in Read more

Frequent oil changes are perhaps the most important procedure you can do to maintain and prolong the life of your Read more
The instrument cluster on the Mercedes W204 is a single sealed unit with a single wiring connection on the back Read more
Please keep this link if you copy the post!