Diagzone Xdiag Subscription Renew, LAUNCH LTR-01 RF Sensor, Thinkdiag Renew , Scania SDP3 Installation
If you have to remove the seats from your Mercedes W204 to replace them or service components beneath them, this tech article I will show you how.
Time: 2 hours
Tab: $0
Talent: 2
Tools: Trim removal tool, E12 socket, T45 Torx driver
Hot Tip: Have a vacuum ready for the carpet under the seats
Performance Gain: Access to seat switches and components beneath seats
Complementary Modification: Clean carpet and interior beneath seats
Applies to: C350 (2007-14), C180 (2007-14), C200 (2007-14), C230 (2007-14), C250 (2007-14), C280 (2007-14), C300 (2007-14), C320 (2007-14) Subscribe ?
Procedures:
Part 1:Front Seats Removal
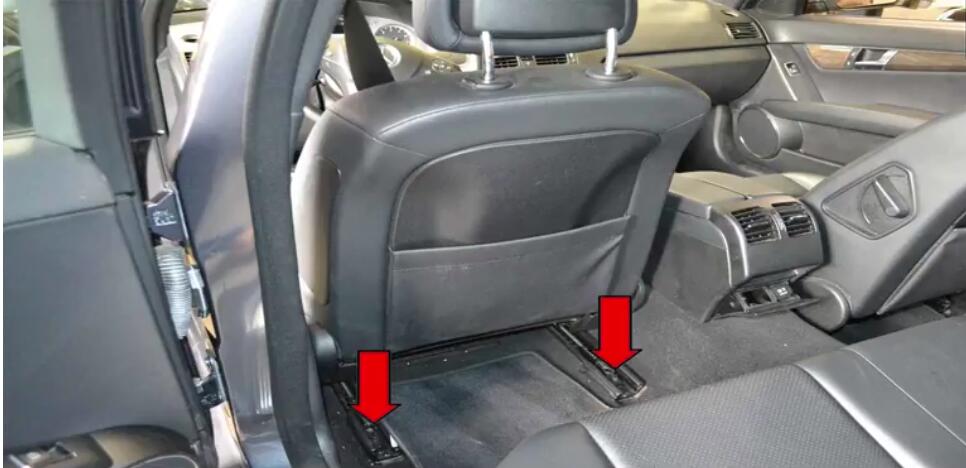
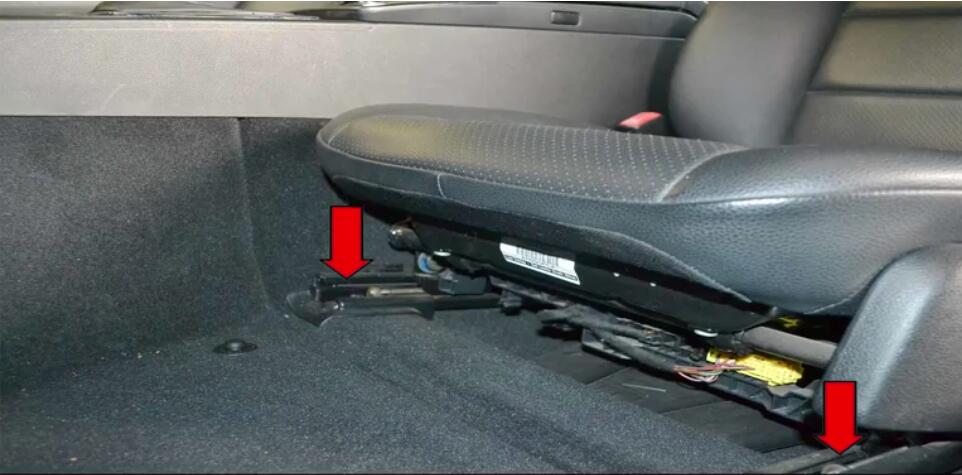
Start by moving your seat as far forward as it will go.Then,remove the two E12 Torx mounting fasteners at the seat rails (red arrows).
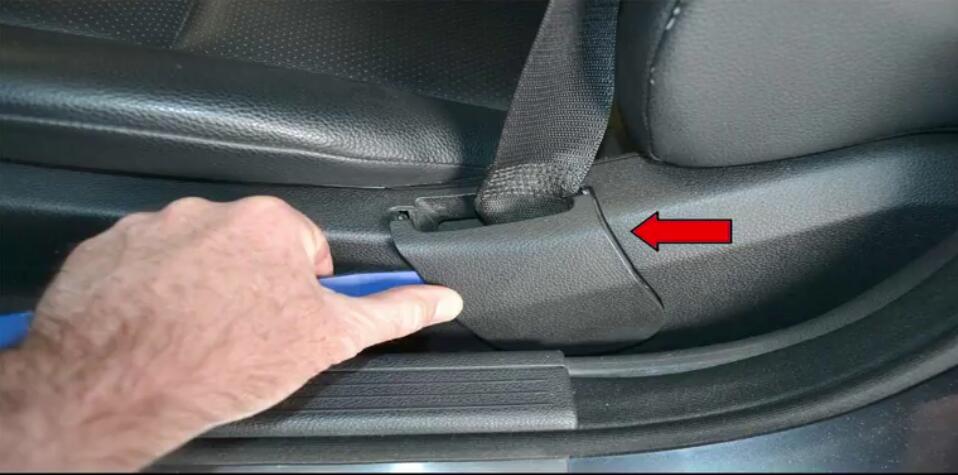
Next,you will have to remove the seat belt from the front seat.Lever off the trim panel on the front seat to expose the seat belt fastener (red arrow).
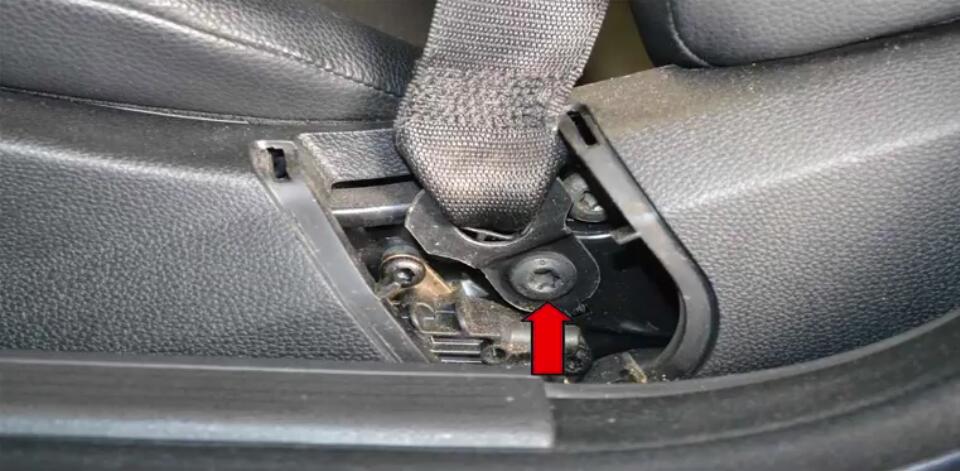
Use a T45 Torx and remove the lower mounting point of the belt from the seat (red arrow).
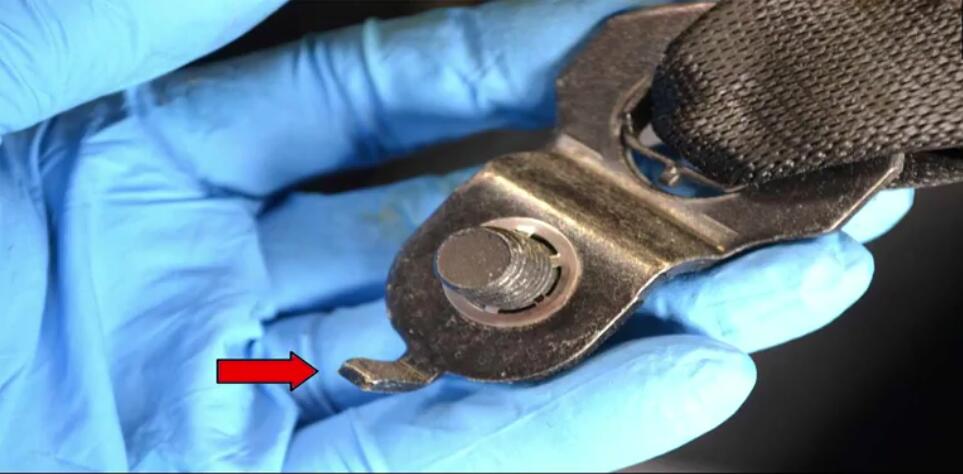
The end of the belt has a nub or locater that needs to sit correctly into the mount in the seat (red arrow).Make sure to locate this correctly when installing.
Once the seat belt,fasteners and trim are removed from your seat,move the seat all the way rearward to expose the seat module electrical connector and front mounting bolts.Remove the two E12 Torx bolts from the front rails (red arrows)
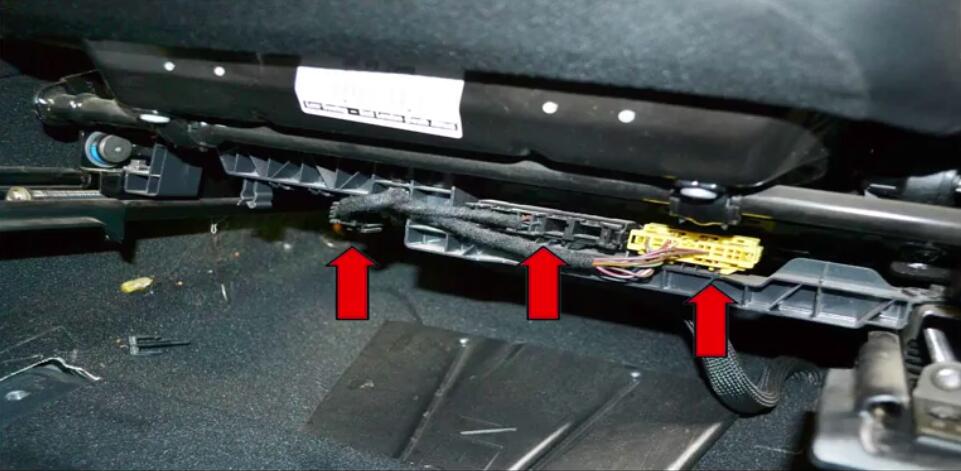
Tilt the seat back and remove the three electrical connectors from the seat module (red arrows).You can now carefully remove the seat from the car.Installation is the reverse of removal.
Part 2:Rear Seats Removal
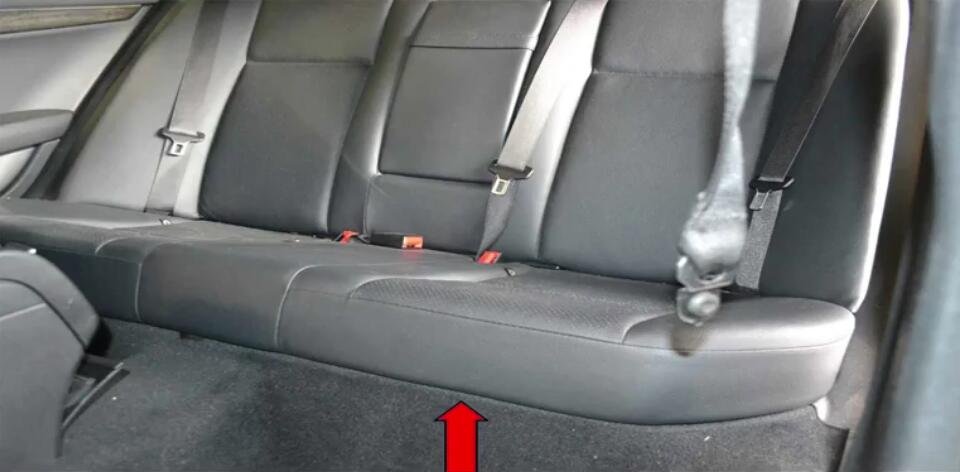
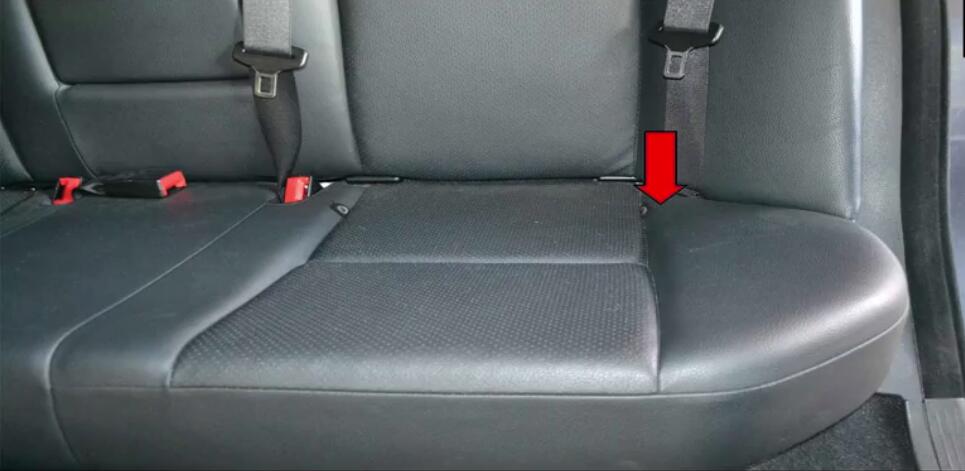
Begin by removing the rear seat cushion.There are two friction clips (red arrow) on each side of the bench;simply grab the bench at the front by the clips and pull straight up.
With the bench lifted you can see the metal hoop attached to the bench that sits in a friction clip in the chassis (red arrow).
There is a metal hook on the bottom of the bench that you cannot see but is approximately where the red arrow is on each side.Side the bench back and lift up and then pull forward and remove the bench.
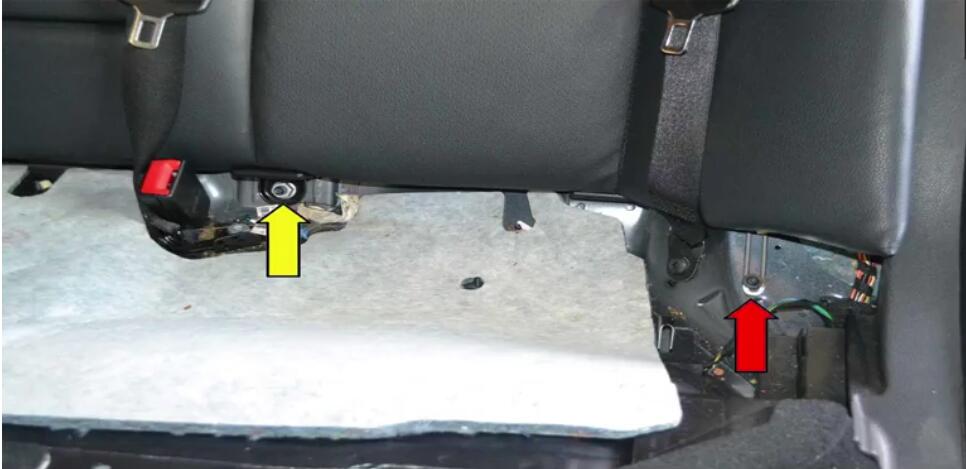
On the rear seat back section use a T25 Torx and remove the Torx screw that holds the side of the seat back (red arrow,one on each side),and then remove the two 16mm nuts (yellow arrow,one shown).
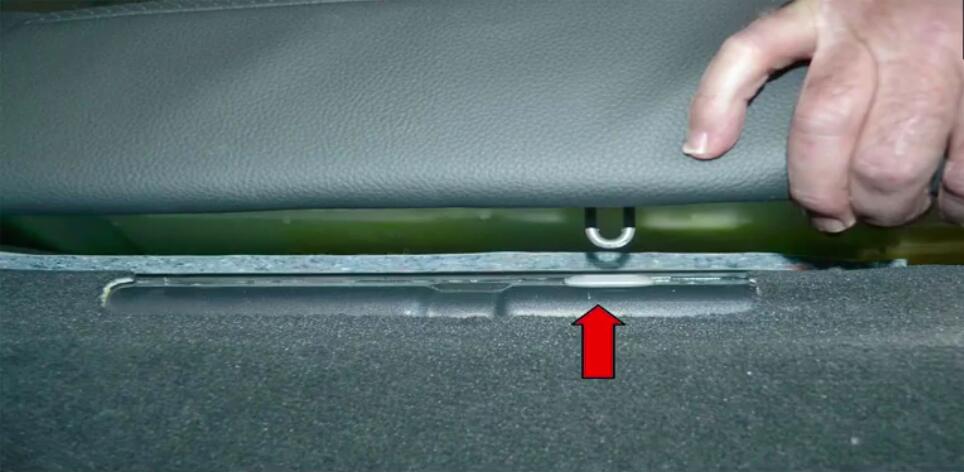
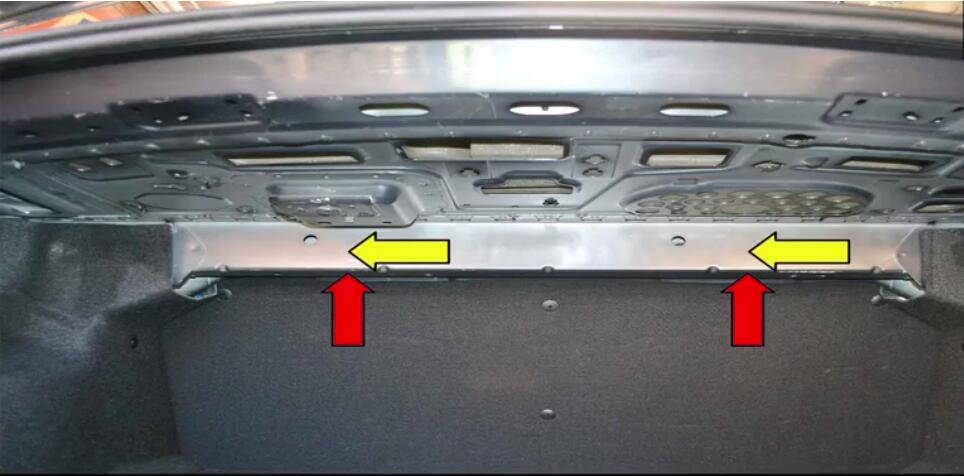
Open the trunk and climb in.You are going to use a flathead screwdriver to release the two latches.Indert the screwdriver into the two holes under the rear chassis cross member (red arrows),and slide the screwdriver to the left (yellow arrows).This will release the upper latches that hold the seat backs in place.
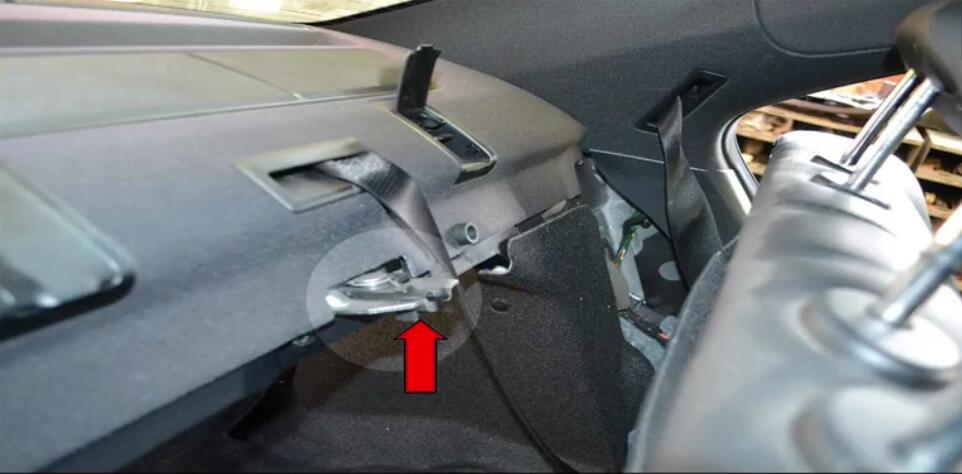
You can now remove the seat back from the vehicle.This photo illustrates one of the two latches that hold the upper section of the seat back to the seat (red arrow).Installation is the reverse of removal.
Done!
How useful was this post?
Click on a star to rate it!
Average rating / 5. Vote count:

Some Friends don't know how to activate win7, when they receive the diagnostic software with win7 sytem. http://www.chinaobd2.com/upload/software/win7activation.zip download this Read more

Please ensure that you choose computer systems that meet our requirements for the installation. You will find adetailed listing in Read more

Frequent oil changes are perhaps the most important procedure you can do to maintain and prolong the life of your Read more

This article show a guide on how to use G-scan2
Please keep this link if you copy the post!