Skip to content
Menu
OBD2 Scanner Blog
  • Home
  • Car Diagnostic Tool
    • MB Star Diagnosis
    • BMW Diagnostic Tool
    • GM Tech2
    • Volvo Vocom Interface
  • OBD2 Code Scanner
    • VXDIAG
  • Tech Support
OBD2 Scanner Blog

How to Renew Rear Oil Seals for Perkins 1000 Series Engine

Posted on April 3, 2023April 3, 2023 by VCDS
How-to-Renew-Rear-Oil-Seals-for-Perkins-1000-Series-Engine

Diagzone Xdiag Subscription Renew, LAUNCH LTR-01 RF Sensor, Thinkdiag Renew , Scania SDP3 Installation

It is necessary to replace new oil seals if you find oil leakage.So here in this post, chinaobd2.com show you guide on how to renew rear oil seals for Perkins 1000 series engine.


Related Contents:

Newest Perkins EST 2022A & 2019A Full Support Free Download

Perkins SPI2 2018A EPC+Service Manual Free Download


Procedures:

To renew the rear oil seals

1 Remove the seals from the housing with a suitable tool used as a lever. Ensure that the seal housing is not damaged. Do not try to press the seals out of the housing as there is a shoulder in the housing (B).

2 Clean thoroughly the oil seal housing. Inspect the oil seals for damage. If only a small scratch can be seen across the lip of the seal, do not fit the seal.

Note: Before the oil seals are fitted into the housing ensure that the correct seal is fitted to the correct side of the housing. Each of the seals has an arrow on the flat face of the seal. This arrow indicates the correct direction of shaft rotation for the seal, see (B2) and (B3).

3 Lubricate lightly the outer circumference of the front oil seal and the bore of the housing for the front seal with clean engine oil.

4 With the flywheel side of the seal housing on a suitable support, press the new front seal into the housing. Use a suitable tool which will apply pressure only to the flat inside face of the seal.

Caution: Use only enough pressure to ensure that the flat face of the seal is against the shoulder in the housing. Too much pressure could damage the shoulder.

How-to-Renew-Rear-Oil-Seals-for-Perkins-1000-Series-Engine

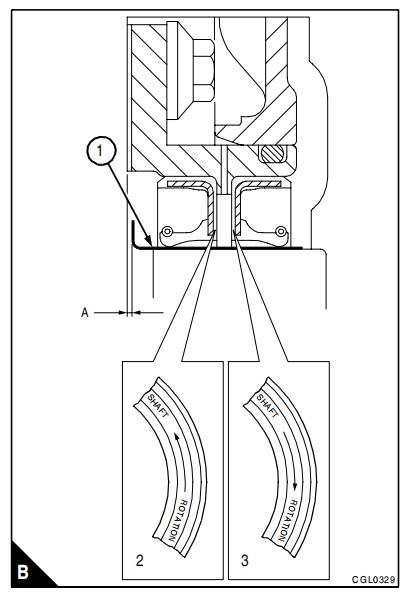
5 Lubricate lightly the outer circumference of the rear oil seal and the bore of the housing with clean engine oil.

6 With the engine side of the seal housing on a suitable support, carefully press the rear oil seal onto the shoulder in the housing with the same tool as for the front seal. Ensure that the seal is against the shoulder in the housing.

Caution: The rear oil seal must not be fitted if the engine is to be operated before the oil is added to the flywheel housing. The seal must be fitted with the seal housing in situ after the engine has been run.

(Visited 60 times, 1 visits today)

How useful was this post?

Click on a star to rate it!

Average rating / 5. Vote count:

Related Posts
Original Handy Baby 2 II Key Programmer Hand-held Car Key Copy Key Programmer for 4D/46/48 Chips
How to Renew Rear Oil Seals for Perkins 1000 Series Engine

Handy Baby 2 II Key Programmer Hand-held Car Key Copy Key Programmer for 4D/46/48 ChipsNote: Language: English, SpanishThis Device can't work together Read more

Renault CAN Clip V175 and Consult 3 III For Nissan Professional Diagnostic Tool 2 in 1

Renault CAN Clip V175 and Consult 3 III For Nissan Professional Diagnostic Tool 2 in 1 Descriptions of Consult 3 Read more

Super VAG K+CAN V4.6 With Multi Language

Super VAG K+CAN V4.6 Top 3 Reasons To Get Super VAG: Software Version: V4.6Supported Languages: English/ Spanish/ Italian/ Portuguese/ GreekUDS Protocol Read more

V3.9 CG100 Airbag Restore Devices Support Renesas

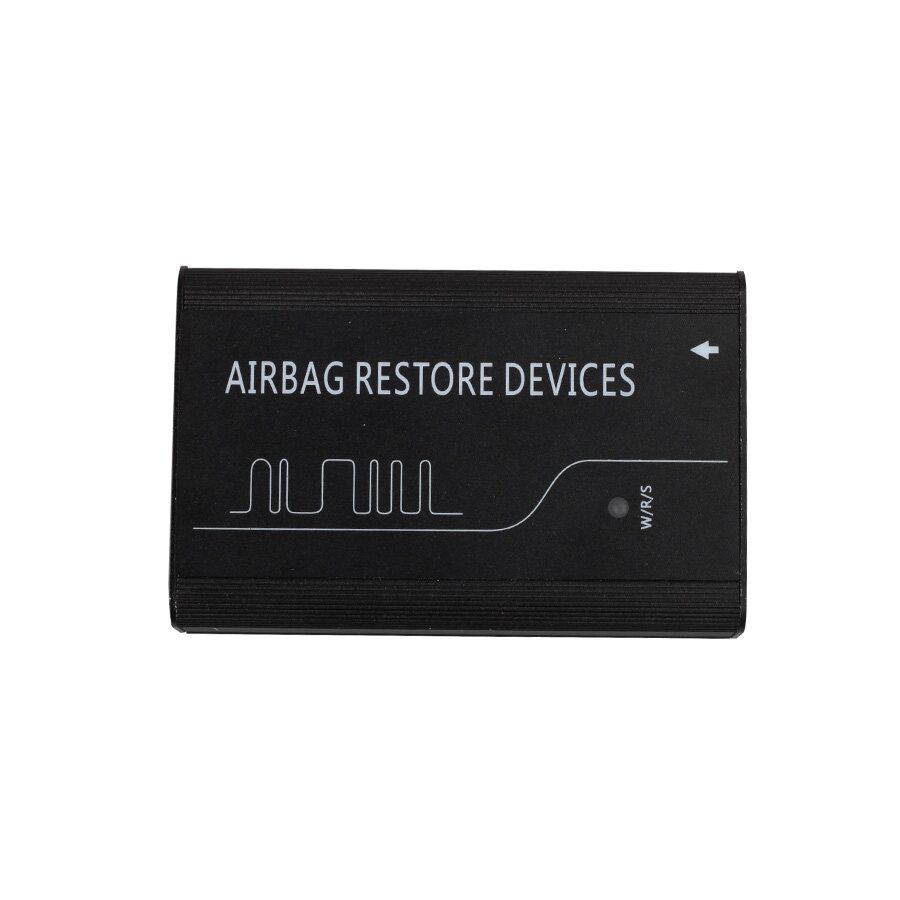
New CG100 Airbag Restore Devices Support Renesas   Top 5 Reasons to Get CG100: 1. Operating Systems:XP/WIN7/WIN8/32bit/64bit 2. Including All Function Read more

This Post: How to Renew Rear Oil Seals for Perkins 1000 Series Engine From ChinaOBD2 Official Blog
Please keep this link if you copy the post!

Tags: cat

Post navigation

Prev: Prev: How to Use ODIS Diagnostics Gateway Coding Function
Next: Next: How Setup Your Diagnostic Interface for JPRO Commercial Diagnostics

Leave a Reply Cancel reply

Your email address will not be published. Required fields are marked *

Recent Posts

  • How to Remove and Replace Cab Heater Controls for JCB 3CX Loader
  • How to Remove Differential Gear for FENDT 900 Vario COMIII
  • Quick Tips to Use Xhorse BMW G Series BDC2 Adapter
  • International MaxxForce 7 SPN 27 FMI 4 EGRP Signal Out of Range Low
  • Detroit DD13 SPN 84 FMI 3 MCM Vehicle Speed Sensor Open Circuit

Recommend OBD2 Scanner

ME9.7 ECU Engine Computer ME9.7 ECU Engine ComputerTabScan T6PT3G Diagnosis VCI for Porsche Diagnostic Tool Porsche Diagnostic Tool

Recent Comments

  • VCDS on Scania SDP3 2.59.1 free download Scania Diagnosis & Programming 3 download link
  • Glynn McKay on Scania SDP3 2.59.1 free download Scania Diagnosis & Programming 3 download link
  • jakub brosz on Scania SDP3 V2.64.3 Download link
  • amr on MAN EOL Flash File Editor + MAN Immo Calculator Free Download
  • Pasquale Greenwald on Jungheinrich ETM/V 10-12 Tightening Torque for Screwed Connection on Brake Systems

Archives

Categories

  • BMW Diagnostic Tool
  • Car Diagnostic Tool
  • Key Cutting Machine
  • Key Programming Tool
  • MB Star Diagnosis
  • OBD2 Code Scanner
  • Tech Support
  • VXDIAG

Tags

adapter Auto Pick and Decoder Car Key Copy Car Key Programmer cat Code Reader diagnostic software ECU Chip Tunning ecu programmer Ford gm handy baby Handy Baby 2 Key Programmer Handy Baby II Key Programmer HEX V2 immo iprog key Key Pro key programmer laptop Launch lish LISHI new arrivals nexiq nexiq link diesel truck interface nexiq truck diagnostic NEXIQ USB Link OBD2 obdii original program Scania VCI smart VAG COM Cable VCDS VCDS Cable VCDS VAG COM Cable vci VW wholesale X-PROG Box X-PROG Box ECU Programmer XPROG-M

Hot Selling

  • Launch CRP129 HD
  • ME 9.7 ECU Engine Computer
  • MINI VCI J2534
  • NCF29XX Programmer

Links

  • BOBD2 Auto Diagnostic Tools Market
  • China OBD2
  • EPS Foam Machine
  • Foxdiag
  • Сканер OBD2
©2025 OBD2 Scanner Blog | Powered by chinaobd2