Diagzone Xdiag Subscription Renew, LAUNCH LTR-01 RF Sensor, Thinkdiag Renew , Scania SDP3 Installation
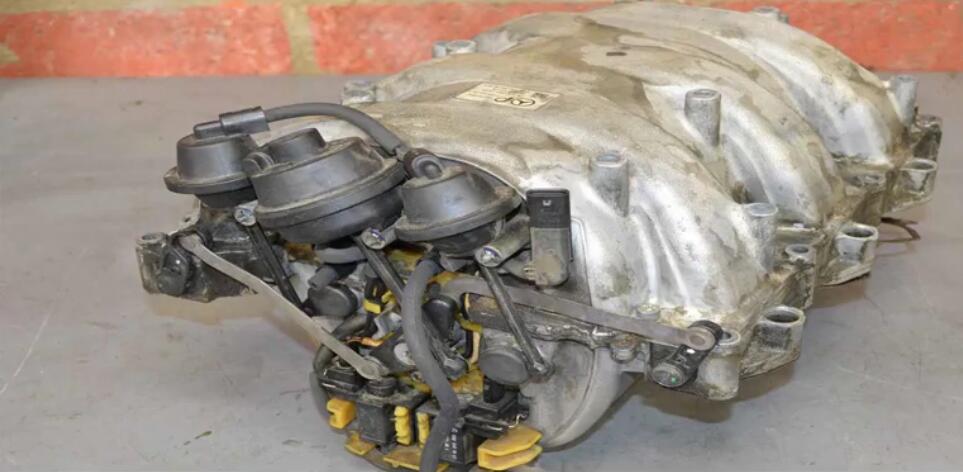
There are several common problems that need to be eventually fixed with the EGR and swirl flaps on the Mercedes intake manifold. Unfortunately, you need to remove the complete manifold to access the repairs.So here I begin this post to show you how to remove Benz intake manifold.
Applies to: C350 (2007-14), SLK350 (2004-14), CLS350 (2004-14), CLK350 (2005-14), E350 (2005-14), S350 (2005-14), SL350 (2005-14), R350 (2006-14), ML350 (2006-14), Viano (2005-14), Sprinter (2006-14), CLC350 (2008-14), GLK350 (2008-12)
Preparations:
Time: 4 hours
Tab: $10
Talent: 3
Tools: T30 Torx, E10 Torx, 17mm wrench, small flathead screwdriver
Parts Required: Gaskets, white lithium grease, O-rings
Hot Tip: Clean around the runners before removing
Performance Gain: Fix problems with the manifold
Complementary Modification: Replace worn out hoses
Procedures:
You need to remove the engine covers and air intake ducts to perform this work,check here to get the detail information: How to Remove Benz C Class W204 Engine Cover
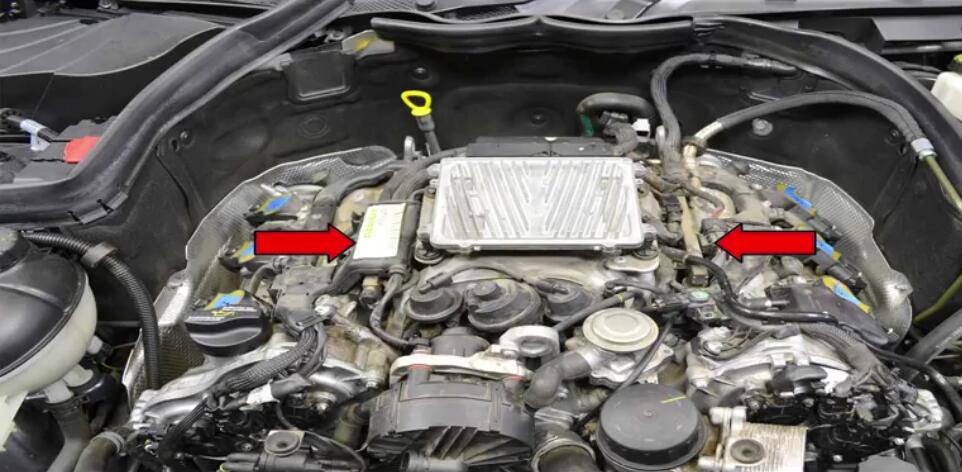
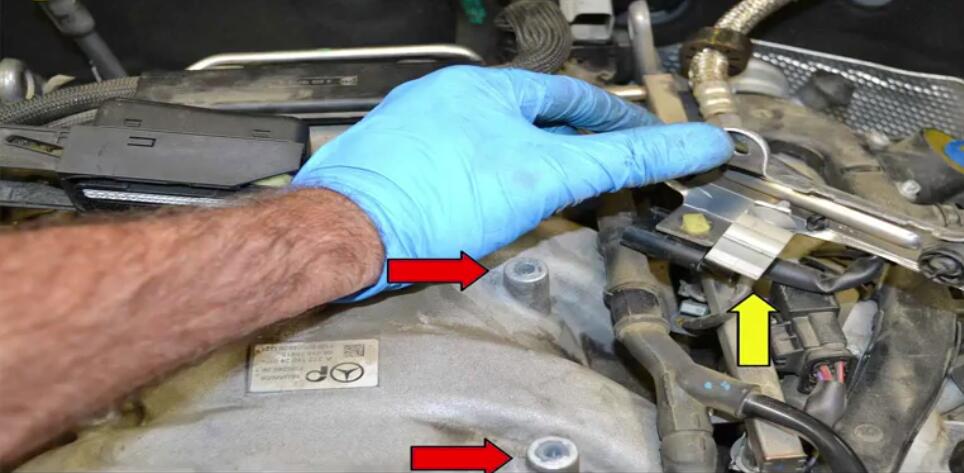
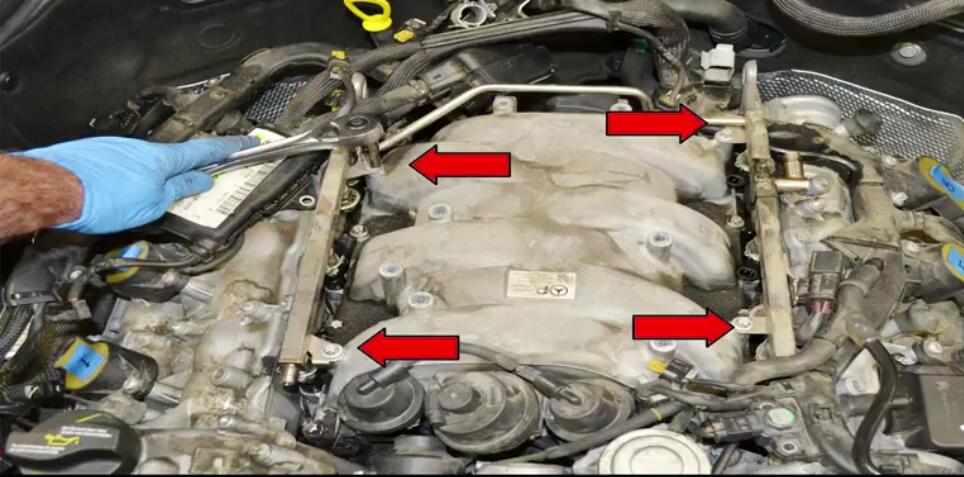
The fuel rail and injectors are located on both the left and right side of the intake manifold and partially hidden by the wiring loom and EGR hoses (red arrows).The fuel rail is a single piece and connected by a piece of pipe that runs along the rear of the ECU unit.
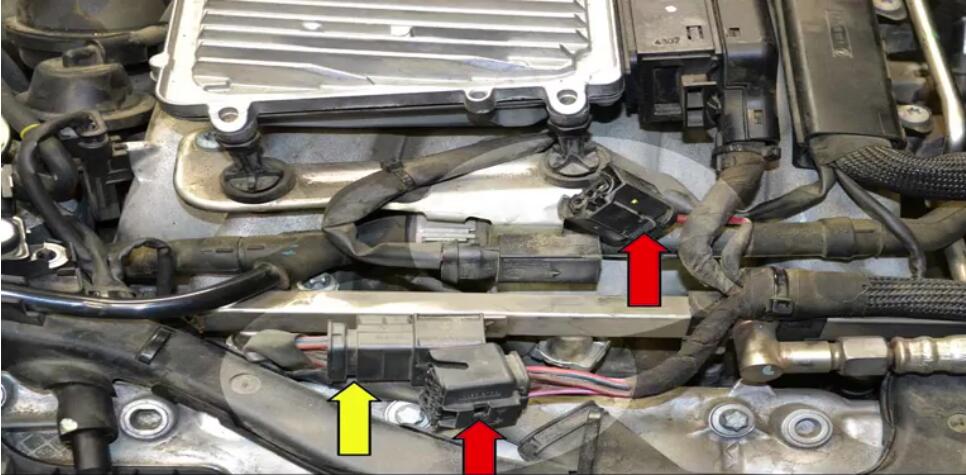
To remove the rail and injector begin by disconnecting the two wiring connections on the left side of the motor (red arrows) and slipping the harness of the fuel rail (yellow arrow).
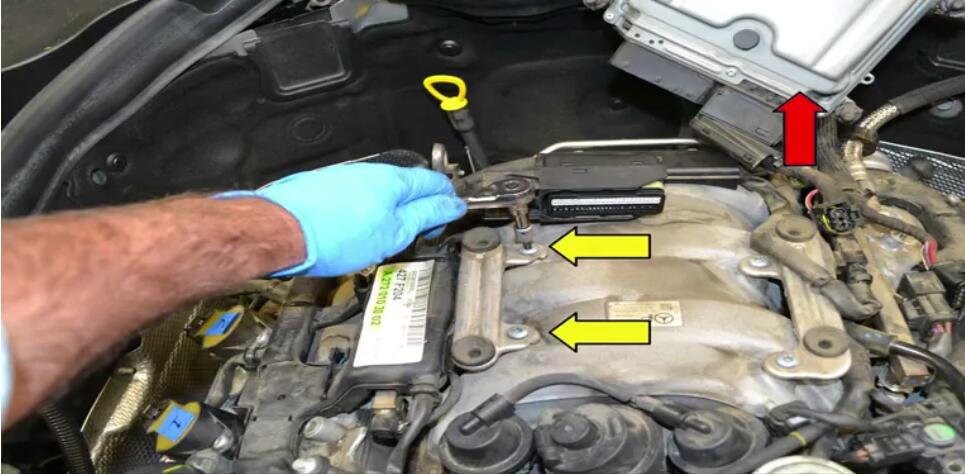
Pull back on the wiring bracket on the right side only for the connection to the ECU (red arrow).This will separate the wiring connection.
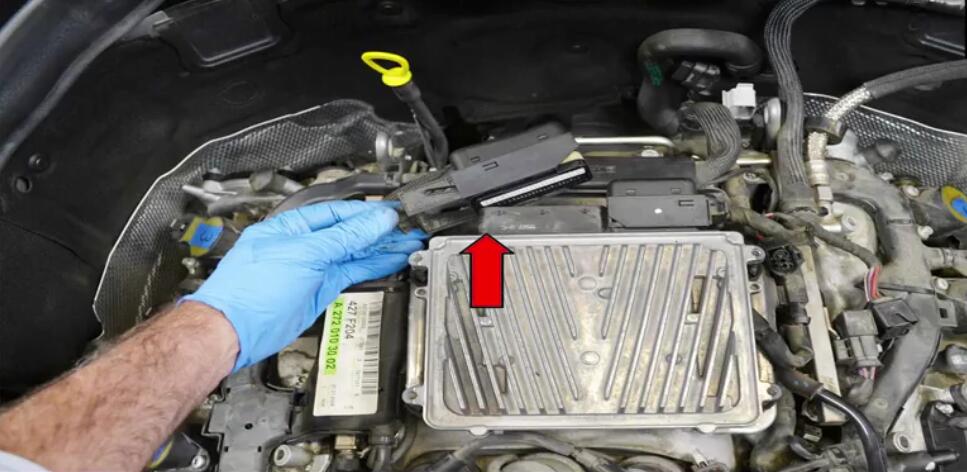
Tilt the EU back out of the way with the left side wiring connection still attached (red arrow).Use a T30 Torx and remove the ECU mount on the right side of the intake manifold (yellow arrows)
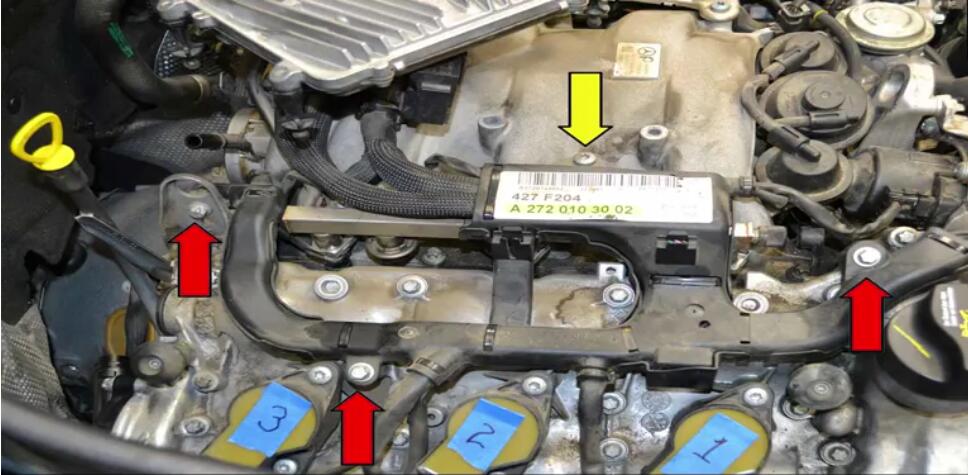
Use an E10 Torx and remove the fasteners holding the wiring loom in place (red arrows) on the right side valve cover.Use a T30 Torx and remove the single Torx screw connecting the wiring loom harness to the intake manifold (yellow arrow).
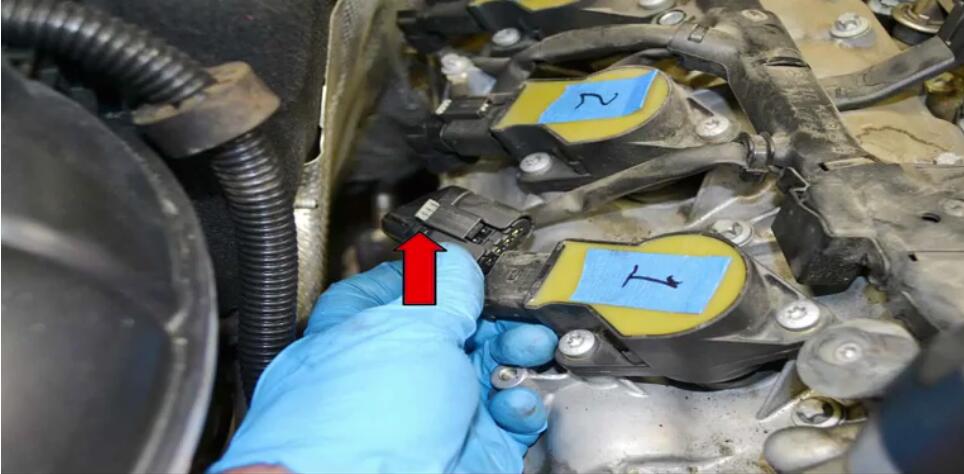
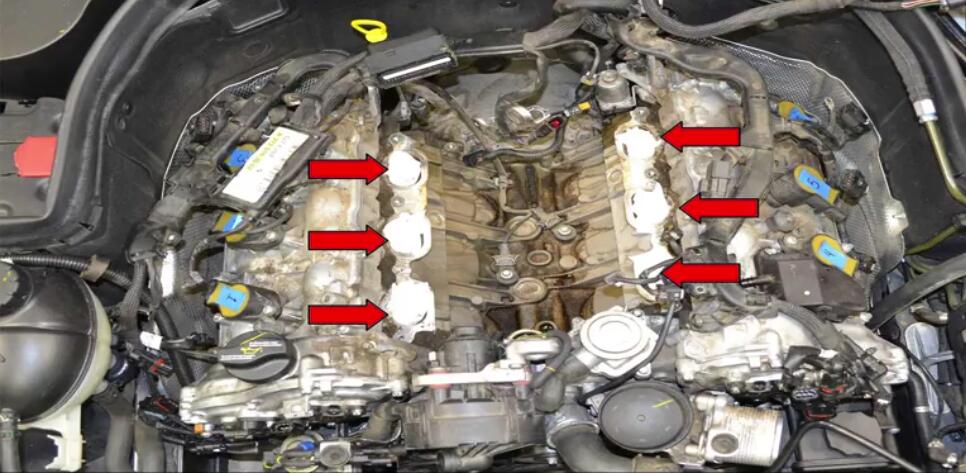
Disconnect the wiring from the coils by using a small screwdriver and pushing the clip back and then gently squeezing the clip and sliding the connections off (red arrow).
Use an E10 Torx and remove the bolt holding the ground wire in place (red arrow)
Continue to use the T30 Torx and remove the two screws holding the wiring harness bracket from the rear of the motor (red arrows)
Disconnect the wiring from the air pump (red arrow)
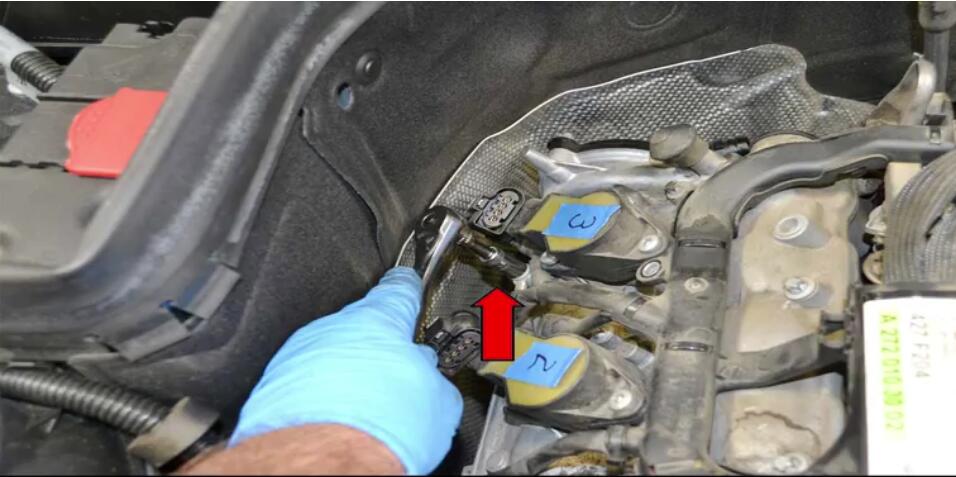
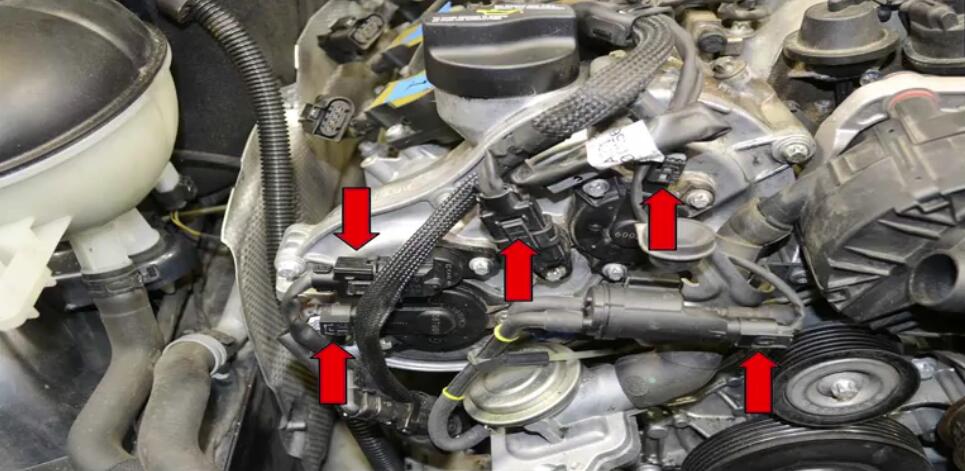
Remove all the electrical connections from the front of the right side cylinder head (red arrows),and move the wiring harness off to the side.
Use an E10 Torx and remove the wiring harness connectors from the left side bank (red arrows),including the one on the lift eye on the rear.
Next,remove the two T30 Torx screws (red arrows) holding the left side ECU bracket and release the EGR hose from underneath it (yellow arrow)
Pull the EGR hose from the top of the throttle body (red arrow) and move the hose out of the way.
The connections for the injectors are small,can be brittle and in a tight spot.Use a small flathead screwdriver and pop up the gray clips (red arrow) and then gently squeeze the clips and pull the connections off each injector.
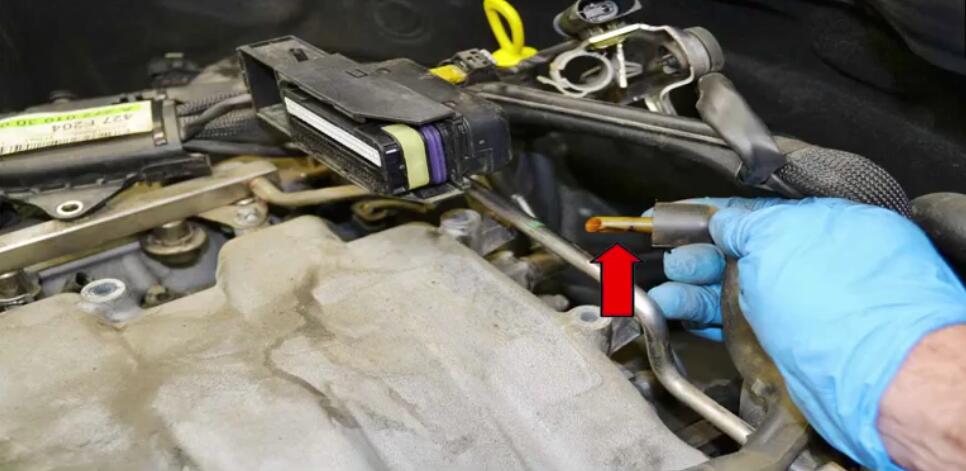
Even though the engine should have been sitting overnight and you have removed the fuel pump relay to try and get the fuel out of the rail there will still be some.Unscrew the Schrader valve cap and wrap a screwdriver in a rag and press in the end of the Schrader valve (red arrow).This will release the remaining pressure in the system.Gas will come out so be prepared to catch and dispose of it according to the regulations in your area.

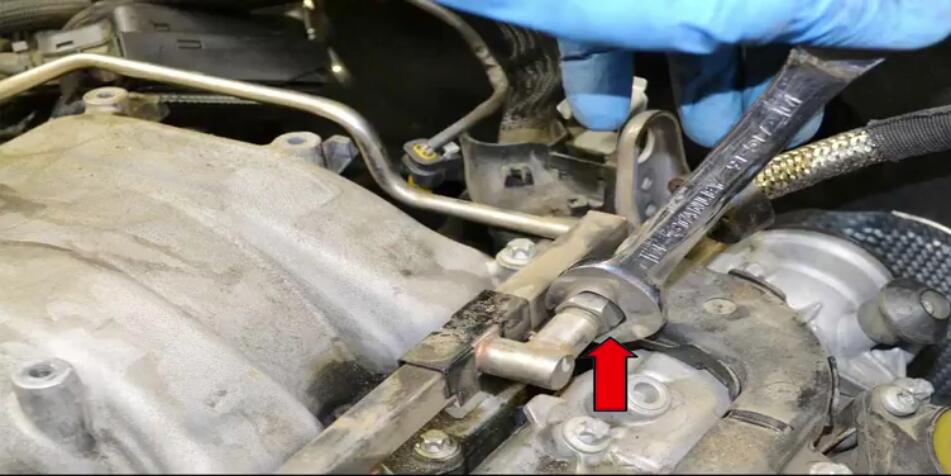
Use a 17mm wrench and separate the fuel line from the distribution rail (red arrow).Some fuel will come out so be prepared to catch and dispose of it according to the regulations in your area.
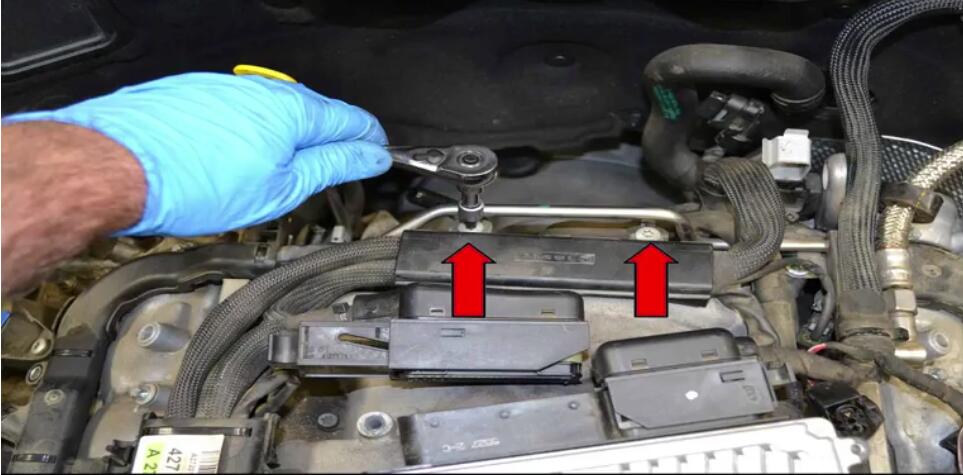
Remove the four E10 Torx bolts holding the fuel rail to the intake manifold (red arrows).
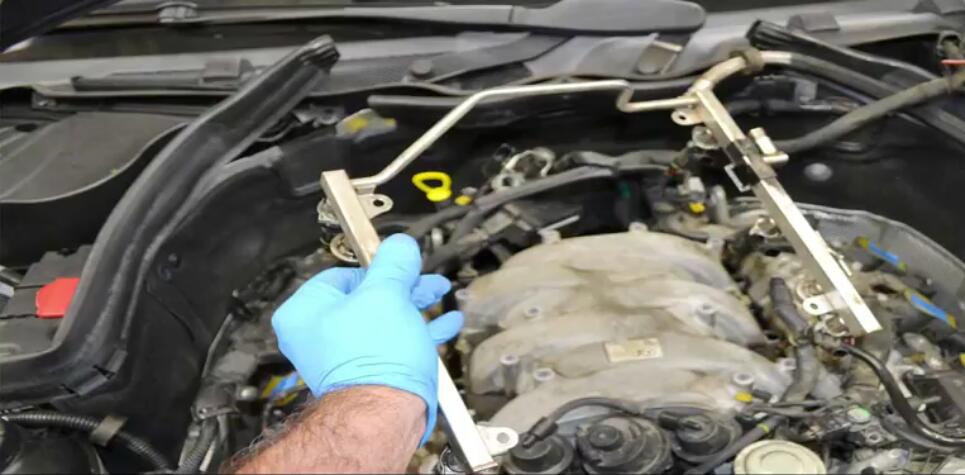
You can now pull the fuel distribution rail out from the manifold.The rail is just held in place by the six O-rings between the injectors and manifold so you should just be able to wiggle and pull it straight up.
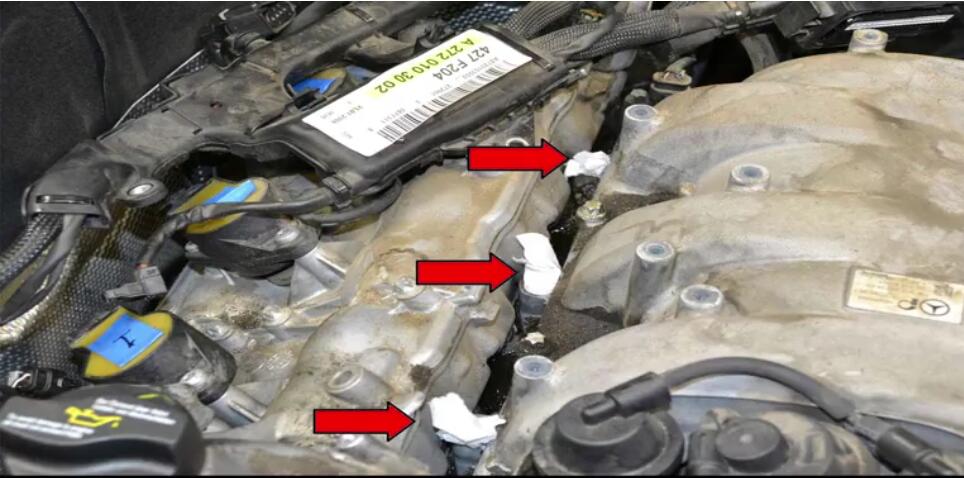
Immediately plug the injector openings with a clean rag or paper towel.The opening leads directly to the combustion chamber,and you do not want anything falling in there (red arrows)
If you do pull the injectors you must replace the O-ring on the lower part of the injectors (red arrow).If you do not separate the injectors from the rail you do not need to replace the upper O-ring.Apply a little white lithium grease when reinstalling the injectors back into the manifold.

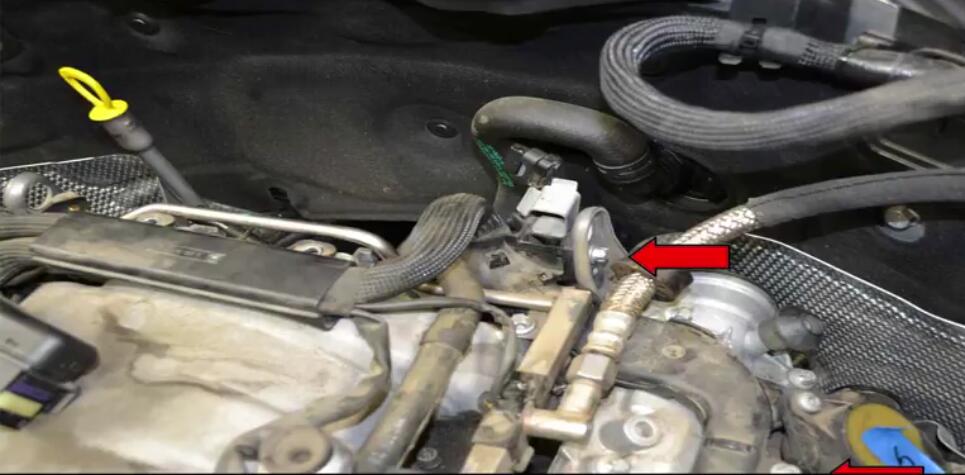
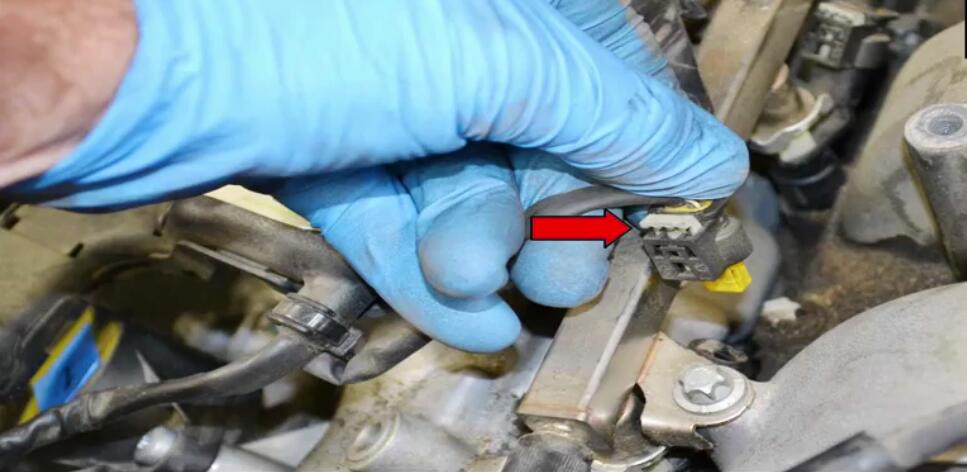
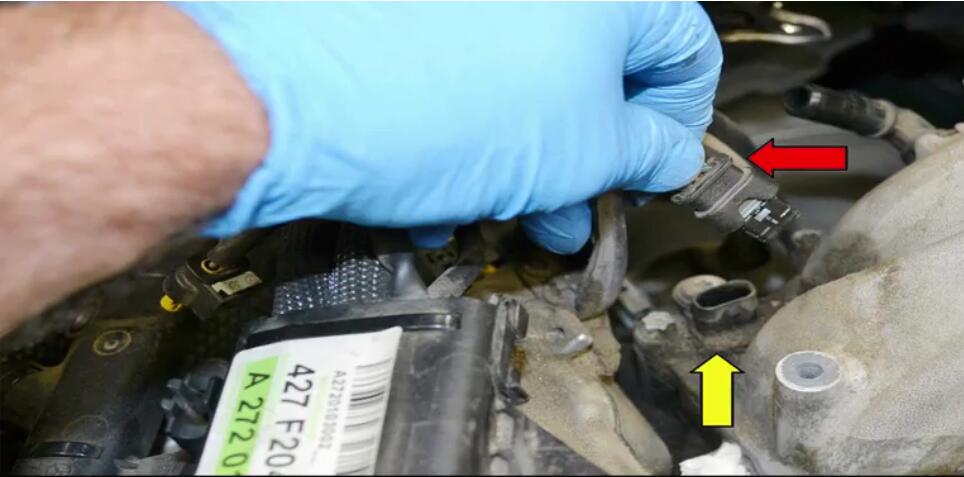
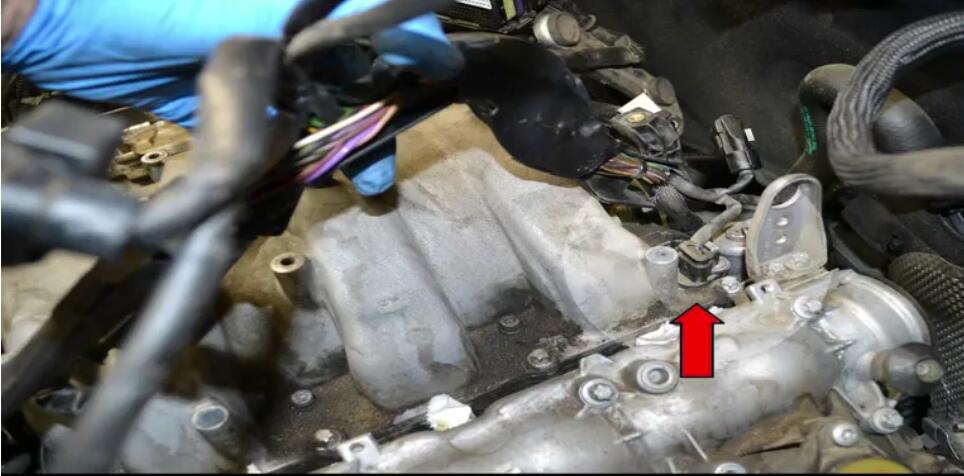
Disconnect the wiring connection (red arrow) from the tumble flap sensor (yellow arrow).There is a small gray tab that faces the rear of the vehicle.Use a small flathead screwdriver and lift the tab up and then gently squeeze the tab and separate the connection.
Separate the wiring connection on the tumble flap sensor on the left rear section of the manifold (red arrow).
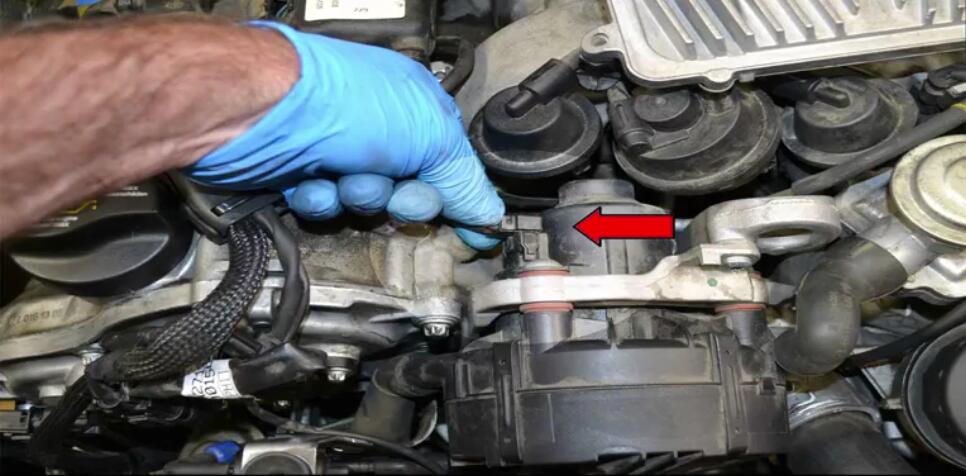
Reach down under the throttle body and separate the wiring connection (red arrow) for the throttle.

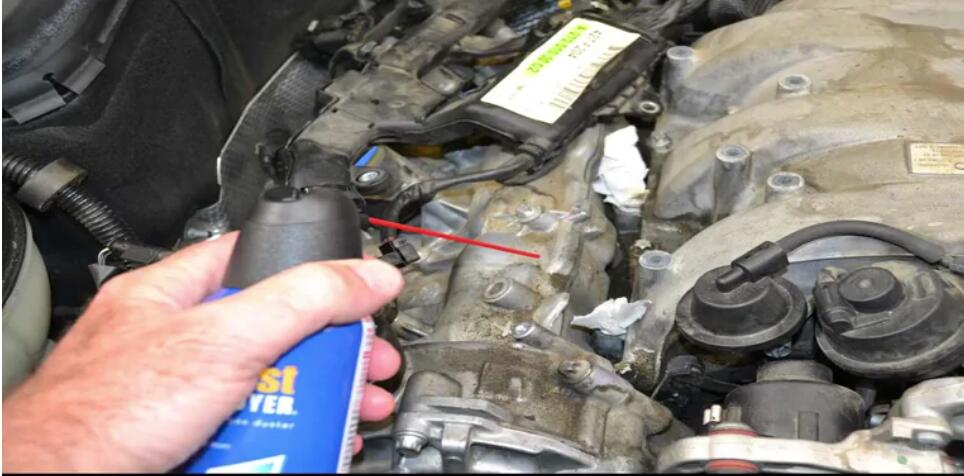
Make sure to clean the area around the intake runners as best you can.Over time a lot of dirt and debris can accumulate there,and you do not want it falling into the intake ports.
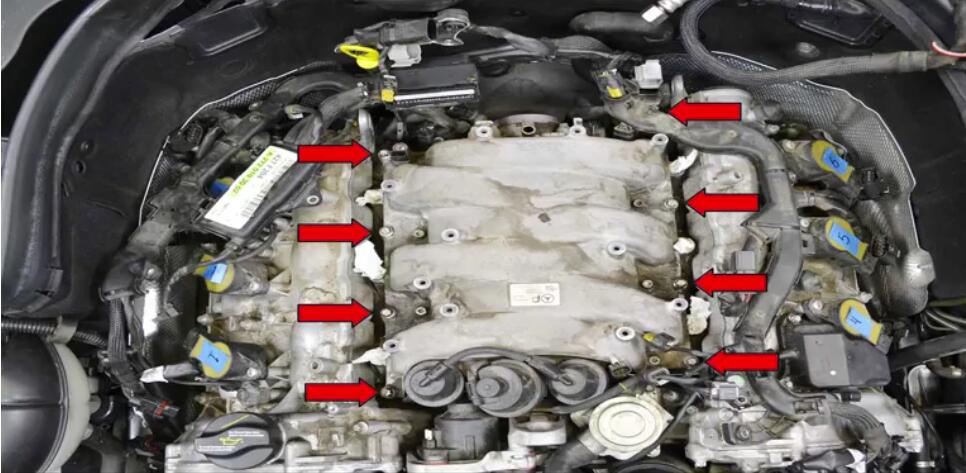
Use an E10 socket and remove the eight bolts holding the manifold to the motor (red arrows)
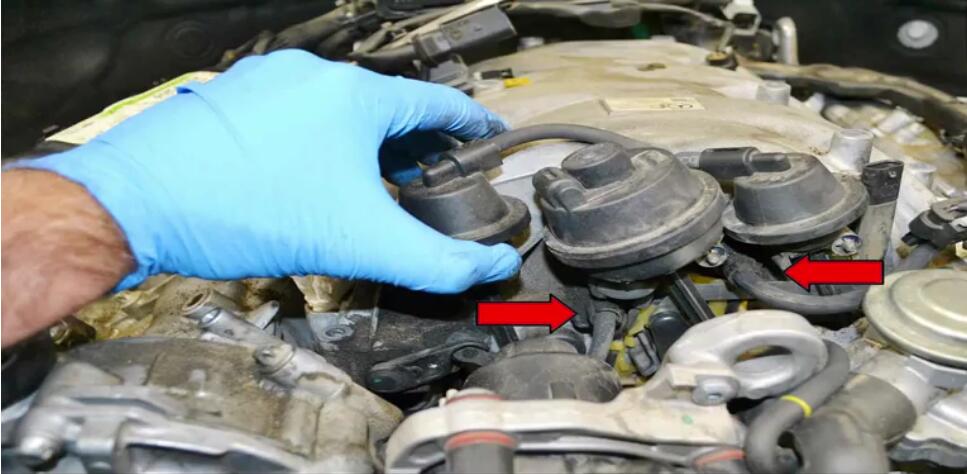
Lift up the front of the intake and separate the two lines going into the manifold (red arrow).Use a small fathead screwdriver and gently pry the hoses back out from the clips.
With the hoses free you can lift the manifold up and out from the engine.Immediately place some rags or paper towels into the intake ports to prevent anything from falling into the ports (red arrows)
You can now address the issues with your intake manifold as well as replace the knock sensor.Installation is the reverse of removal.Don
How useful was this post?
Click on a star to rate it!
Average rating / 5. Vote count:

Some Friends don't know how to activate win7, when they receive the diagnostic software with win7 sytem. http://www.chinaobd2.com/upload/software/win7activation.zip download this Read more

Please ensure that you choose computer systems that meet our requirements for the installation. You will find adetailed listing in Read more

Frequent oil changes are perhaps the most important procedure you can do to maintain and prolong the life of your Read more

This article show a guide on how to use G-scan2
Please keep this link if you copy the post!