Diagzone Xdiag Subscription Renew, LAUNCH LTR-01 RF Sensor, Thinkdiag Renew , Scania SDP3 Installation
This instruction show you guide on how to remove center joint and center frame for HITACHI EX5600-7B excavator.
Related Contents:
Hitachi Dr.ZX diagnostic Tool
Hitachi AllinOne MPDr v3.32 v2.25 2021 Diagnostic Software Free Download
Hitachi Excavator ZX-5A ZX-5B ZX-5G Workshop Service Manuals PDF
Procedures:
1 Remove the hoses under center joint (1).
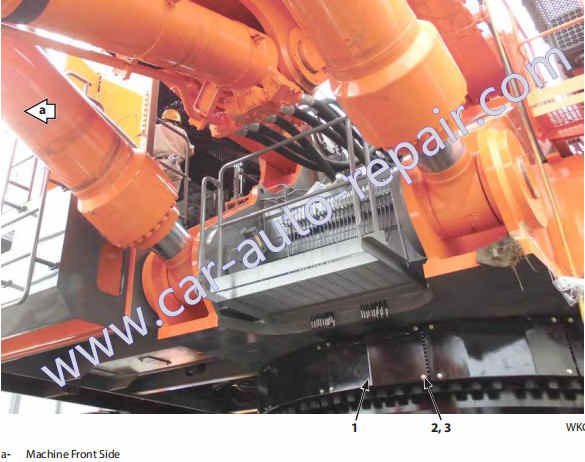
2 Remove bolts (2) (4 used) and washers (3) (4 used).
Remove cover (1).
3 Remove bolts (1) (6 used) and washers (2) (6 used).
Remove cover (3).
j : 22 mm
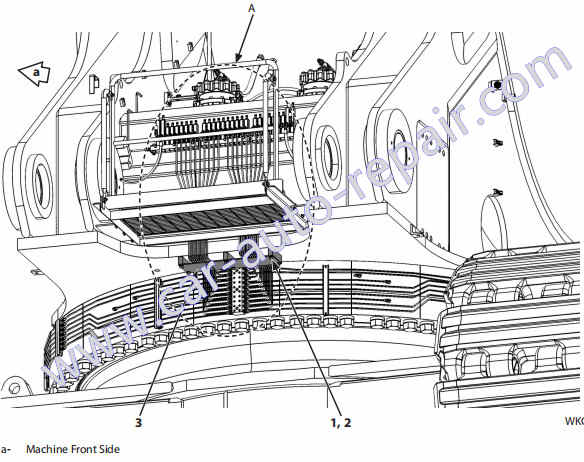
4 Remove bolts, washers (4) (4 used) and clamps (5) (2 used).
j : 17 mm
5 Disconnect the both ends of pipes (6) (24 used).
j : 17 mm

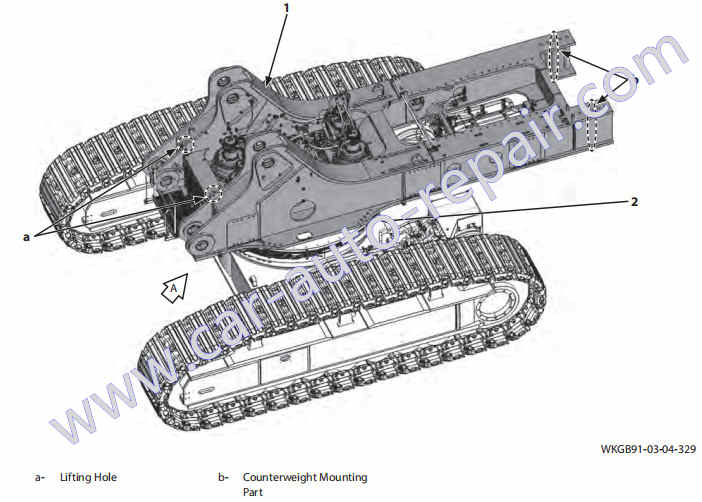
CAUTION: Upperstructure (1) weight: 50100 kg
(110500 lb)
IMPORTANT: Install a soft rubber onto the wire rope contacting surface in order not to damage the main frame.
6 Install shackles (2 used) to lifting holes (a) (2 places).
Attach nylon slings onto the shackles (2 used).
Attach wire ropes onto counterweight mounting parts (b) (2 places). Hoist and hold upperstructure
(1) by using nylon slings and wire ropes.
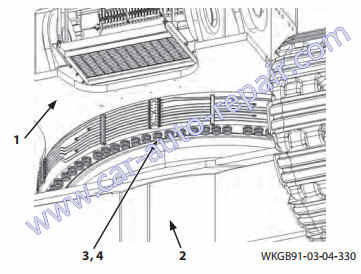
7 Put the matching marks on upperstructure (1) and undercarriage (2). Remove bolts (3) (62 used) and washers (4) (62 used). Remove upperstructure (1) from undercarriage (2). Place upperstructure (1) onto wooden blocks.
More repair case for Hitachi,please refer to Hitachi excavator trouble repair
How useful was this post?
Click on a star to rate it!
Average rating / 5. Vote count:

Some Friends don't know how to activate win7, when they receive the diagnostic software with win7 sytem. http://www.chinaobd2.com/upload/software/win7activation.zip download this Read more

Please ensure that you choose computer systems that meet our requirements for the installation. You will find adetailed listing in Read more

Frequent oil changes are perhaps the most important procedure you can do to maintain and prolong the life of your Read more

This article show a guide on how to use G-scan2
Please keep this link if you copy the post!