Skip to content
Menu
OBD2 Scanner Blog
  • Home
  • Car Diagnostic Tool
    • MB Star Diagnosis
    • BMW Diagnostic Tool
    • GM Tech2
    • Volvo Vocom Interface
  • OBD2 Code Scanner
    • VXDIAG
  • Tech Support
OBD2 Scanner Blog

How to Install ATRIS Technik 2016 Step by Step

Posted on March 25, 2019March 25, 2019 by VCDS
How to Install ATRIS Technik 2016 Step by Step (1)

Diagzone Xdiag Subscription Renew, LAUNCH LTR-01 RF Sensor, Thinkdiag Renew , Scania SDP3 Installation

This article show a guide on how to install ATRIS Technik 2016 step by step.Hope it helps!

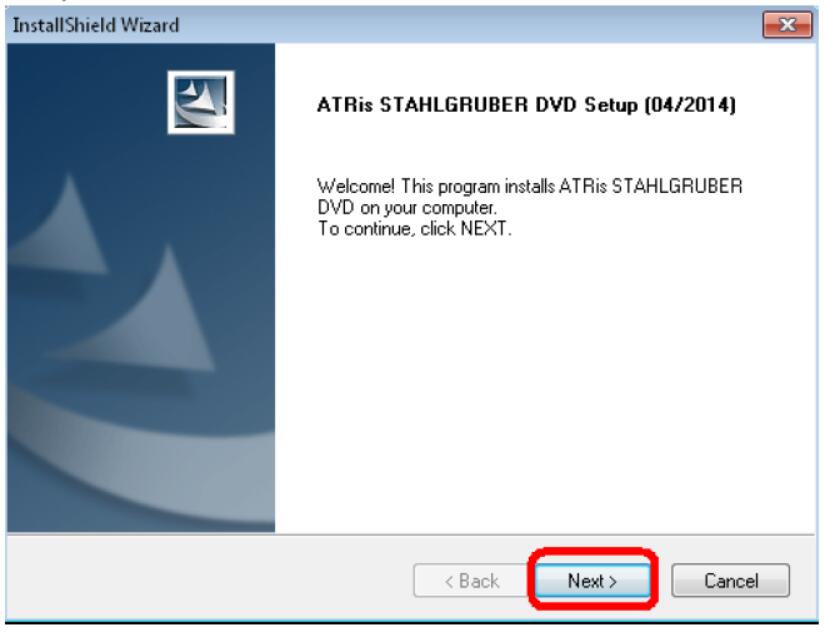
Step 1. Mount the STG_D_116_DVD1.iso and run Install.exe (IF automatic NOT come…)

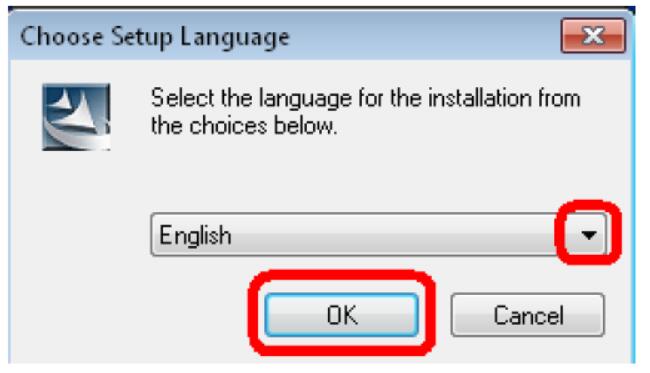
Step 2. Choose your Language & click OK

How to Install ATRIS Technik 2016 Step by Step (1)

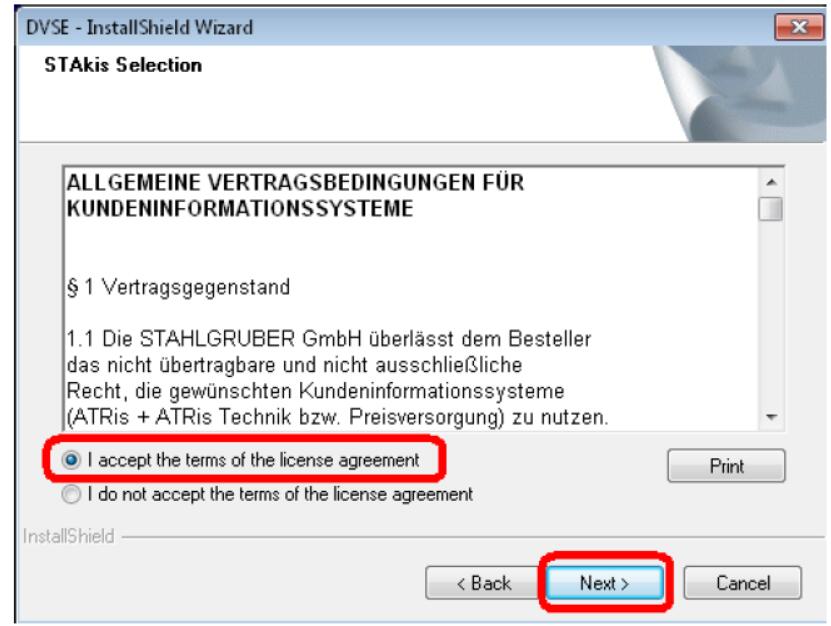
Step 3. Accept the License Agreement and click Next

How to Install ATRIS Technik 2016 Step by Step (2)

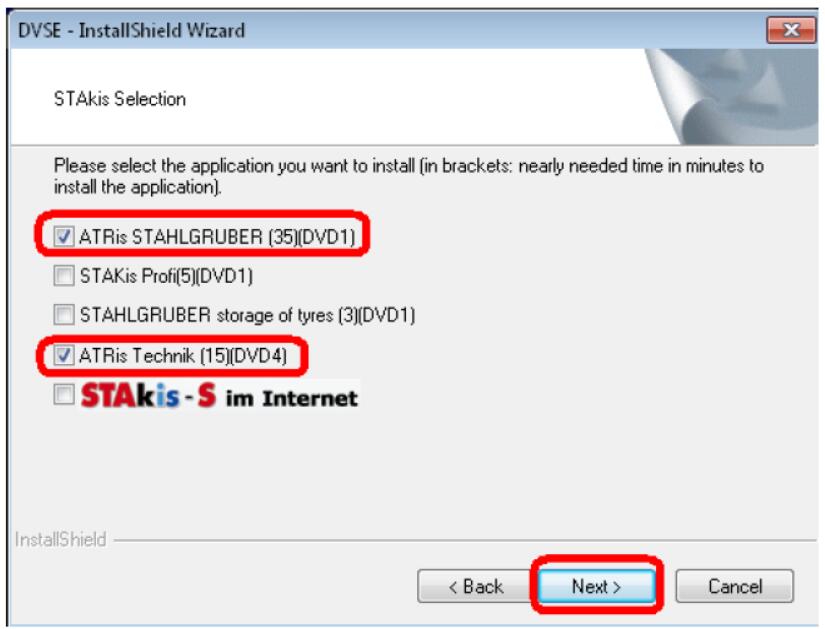
Step 4. Select (Tick) BOTH DVD1 & DVD4 and then click Next

How to Install ATRIS Technik 2016 Step by Step (3)

Step 5. Click Next

How to Install ATRIS Technik 2016 Step by Step (4)

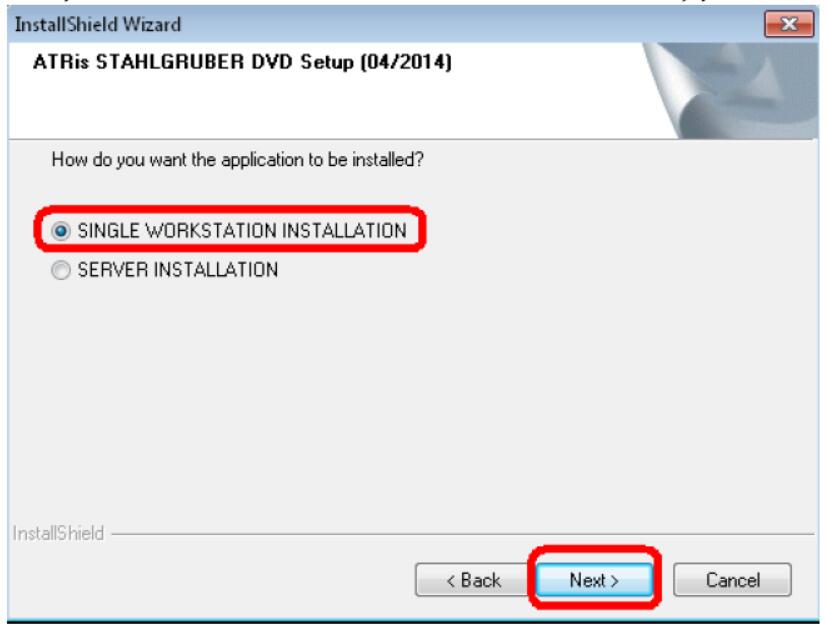
Step 6. Select the SINGLE Installation type and click Next

How to Install ATRIS Technik 2016 Step by Step (5)

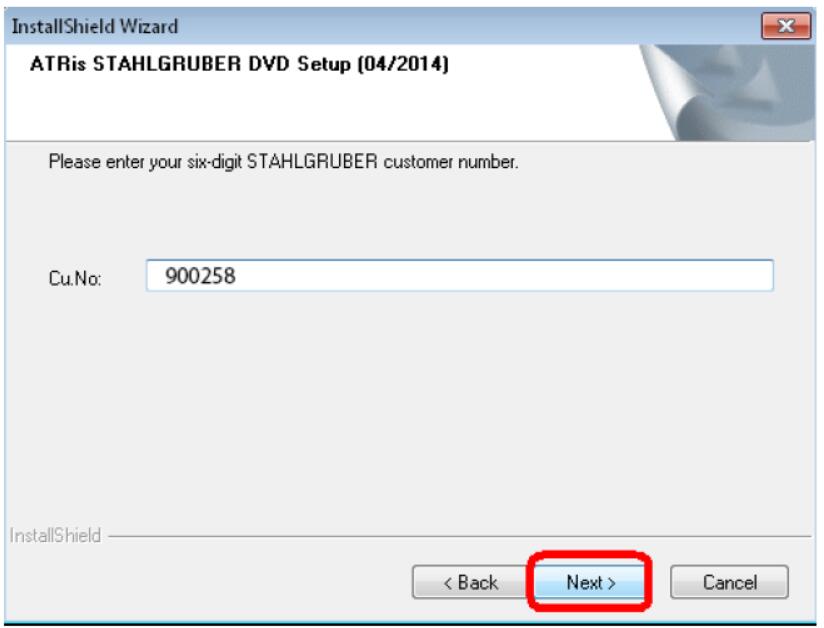
Step 7. Type 900258 (or leave blank) the Cu.No field and click Next

How to Install ATRIS Technik 2016 Step by Step (6)

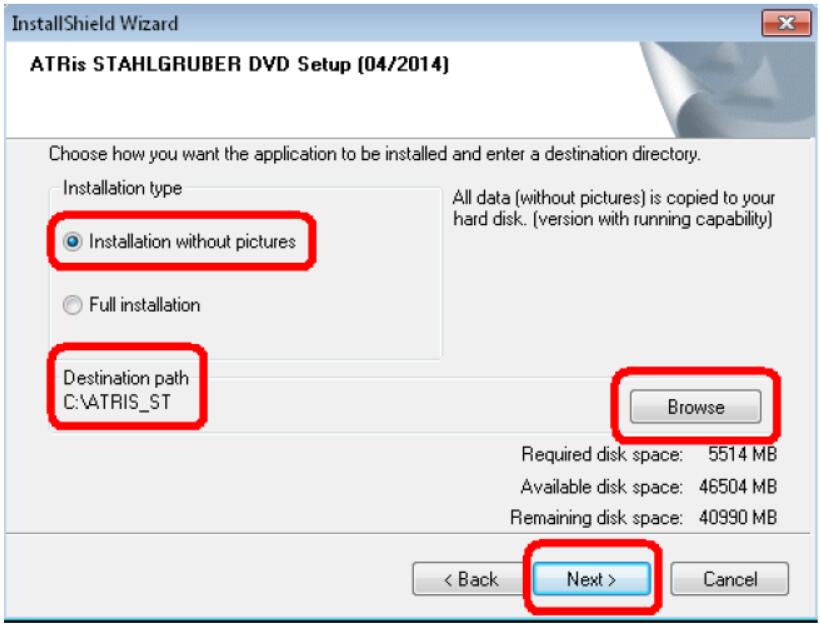
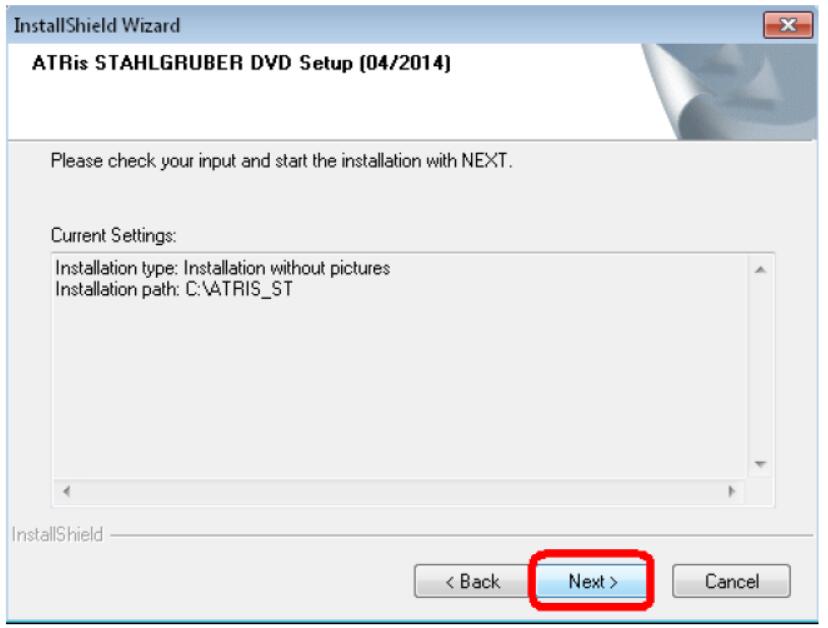
Step 8. Select Installation WITHOUT pictures, choose the Destination Path/Folder and click Next

How to Install ATRIS Technik 2016 Step by Step (7)

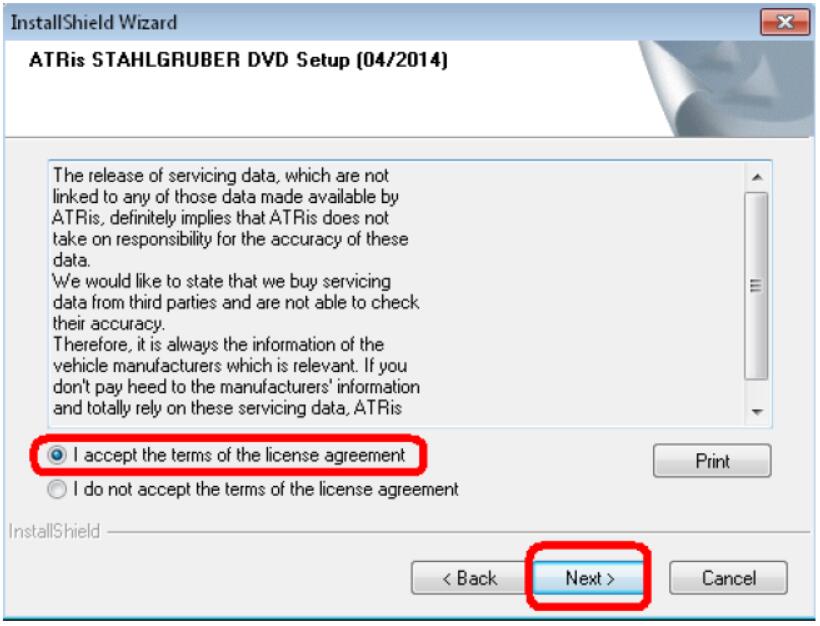
Step 9. Accept the License Agreement and click Next

How to Install ATRIS Technik 2016 Step by Step (8)

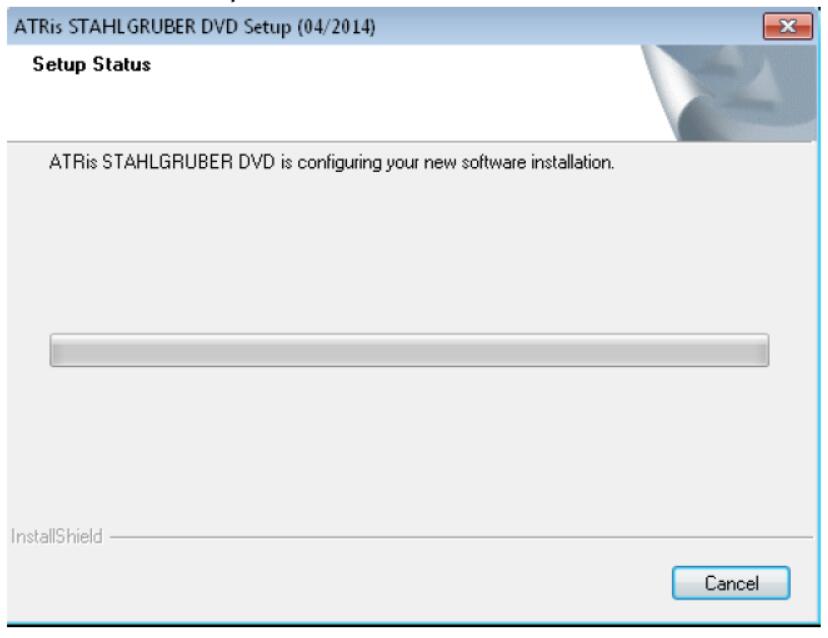
Step 10. Click Next and the installation will start.

How to Install ATRIS Technik 2016 Step by Step (9)

Please have patience till installation to finish…

How to Install ATRIS Technik 2016 Step by Step (10)

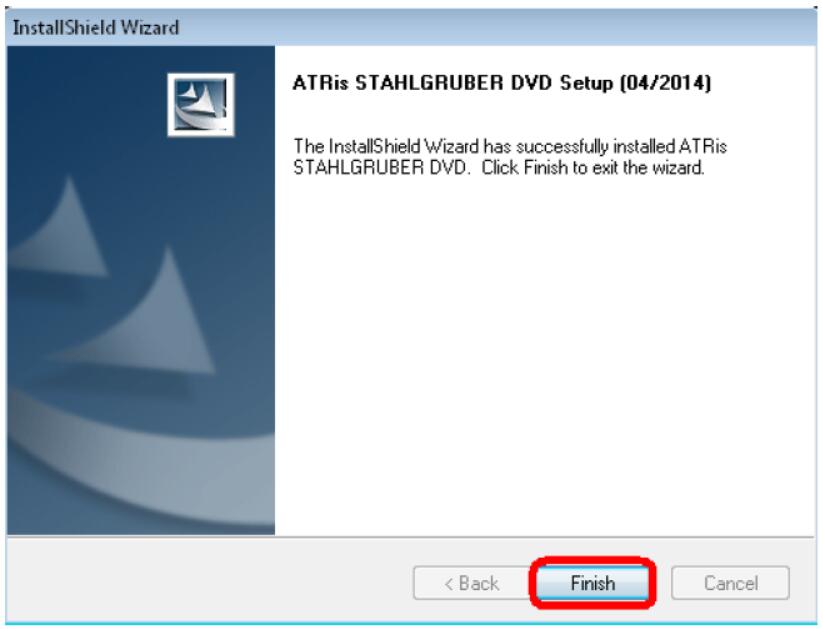
Step 11. When the installation completed, click Finish

How to Install ATRIS Technik 2016 Step by Step (11)

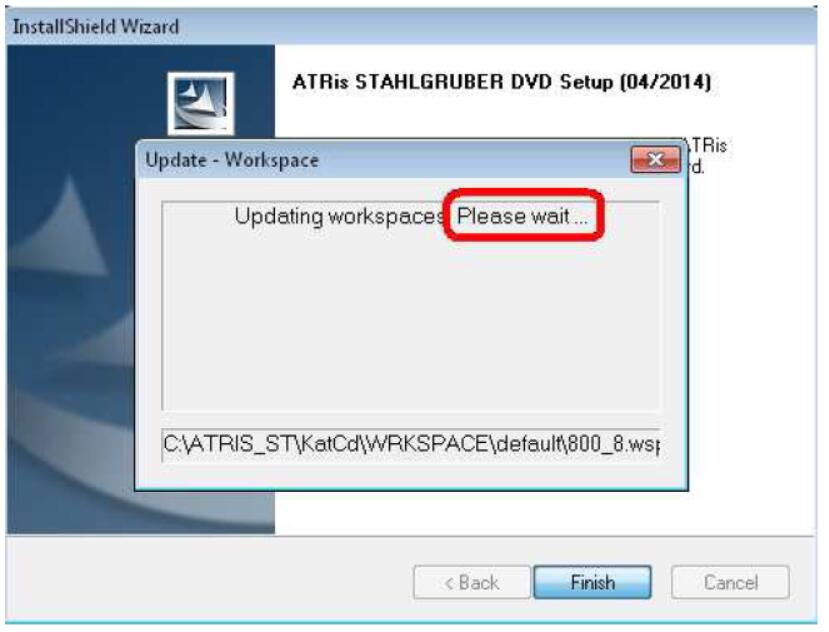
Step 12. Now wait few minutes till the DataBase to updated…

How to Install ATRIS Technik 2016 Step by Step (12)

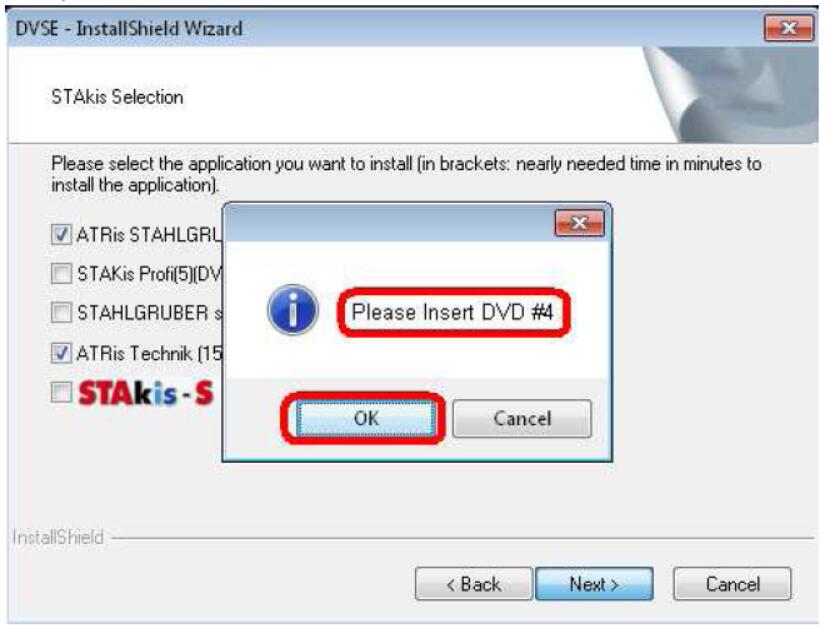
Step 13. Now mount the STG_D_116_DVD4.iso and click OK

How to Install ATRIS Technik 2016 Step by Step (13)

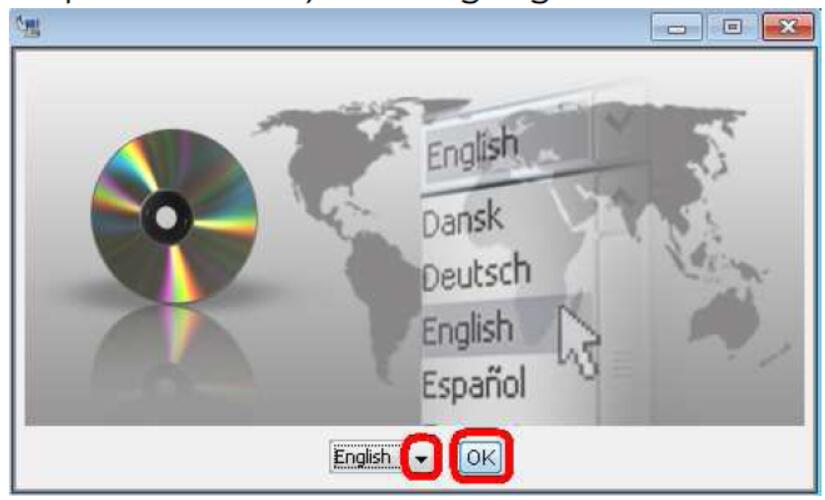
Step 14. Choose your Language and click OK
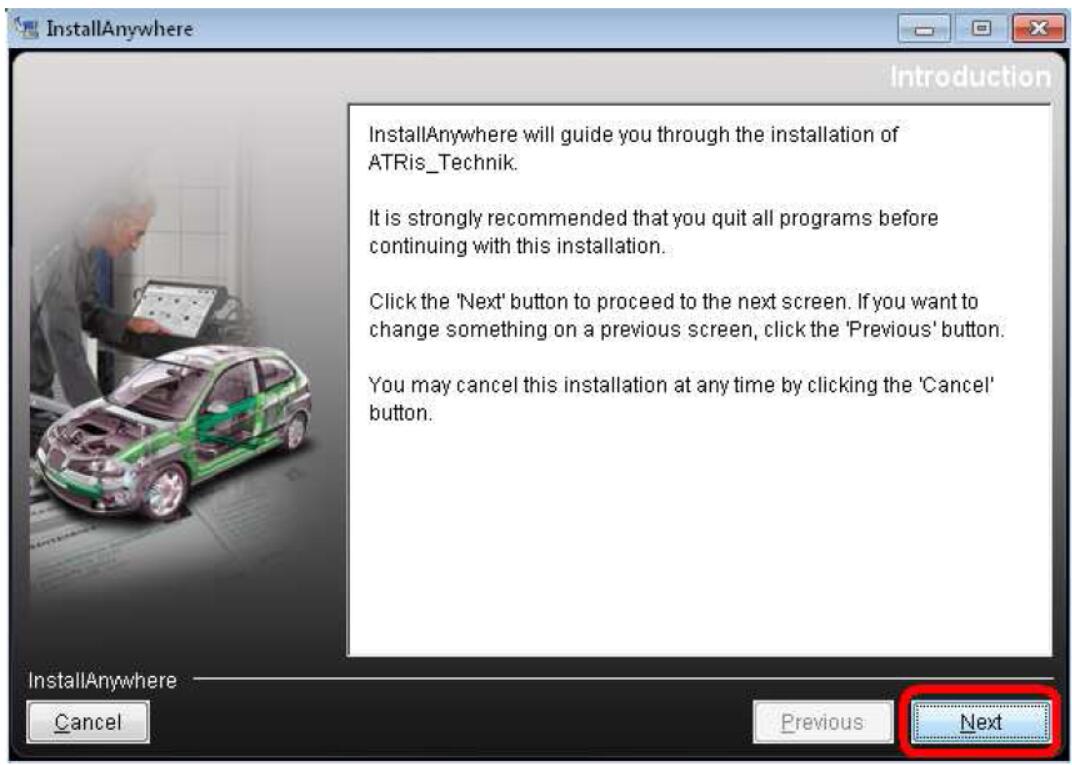
How to Install ATRIS Technik 2016 Step by Step (14)

Step 15. Click Next

How to Install ATRIS Technik 2016 Step by Step (15)

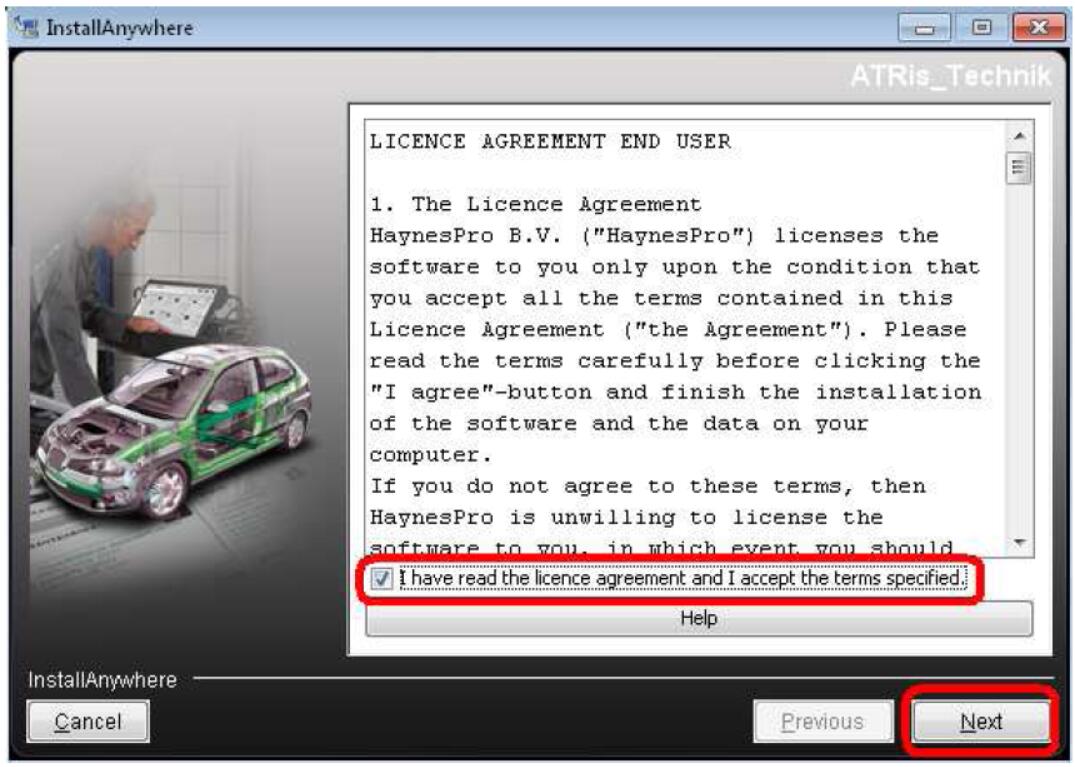
Step 16. Accept (Tick) the License Agreement and click Next

How to Install ATRIS Technik 2016 Step by Step (16)

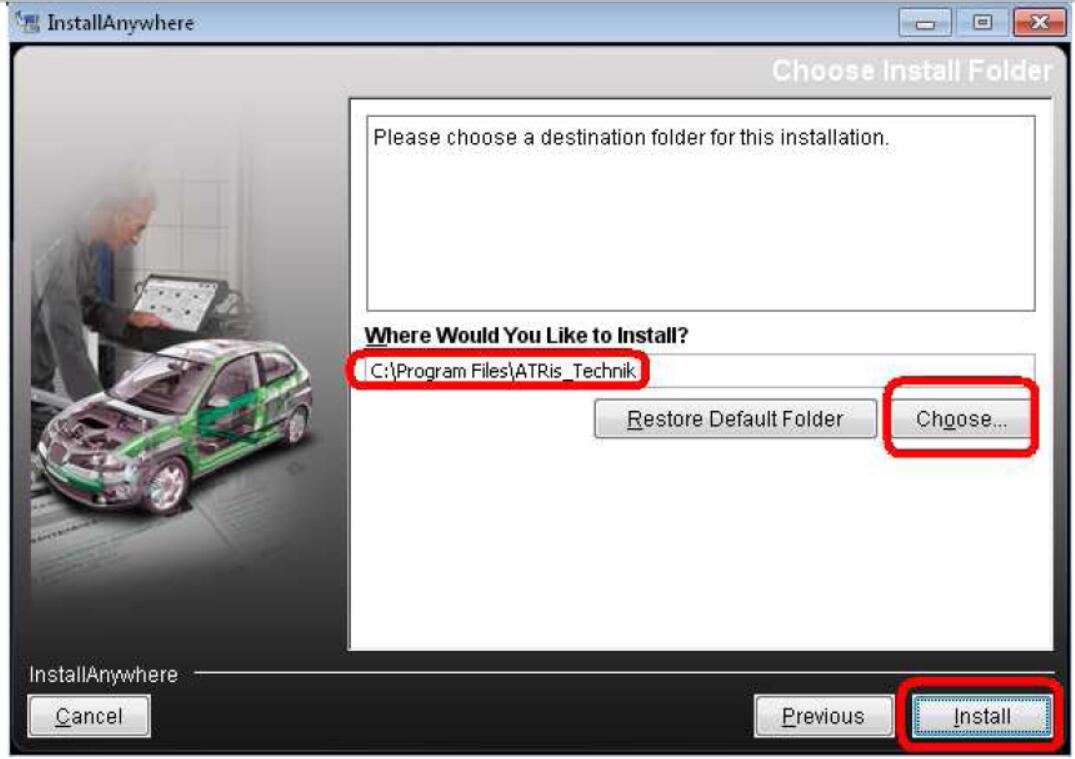
Step 17. Choose the Destination Install Folder and click Install

How to Install ATRIS Technik 2016 Step by Step (17)

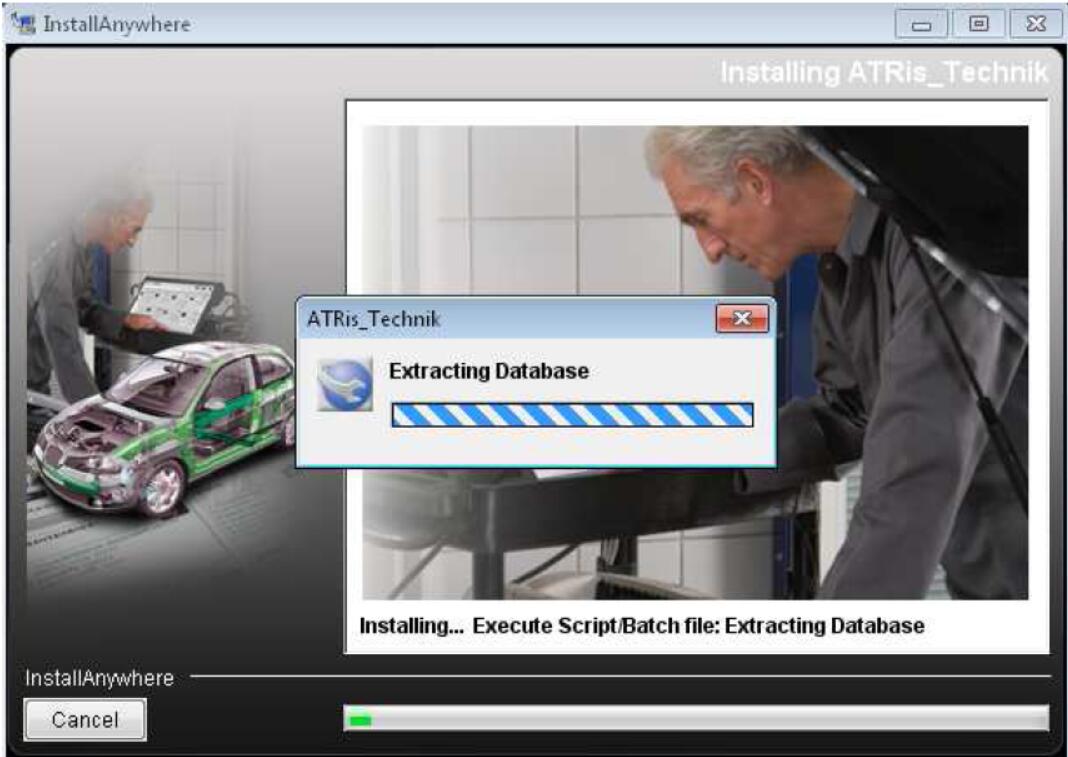
Step 18. Installation started. Please have patience…

How to Install ATRIS Technik 2016 Step by Step

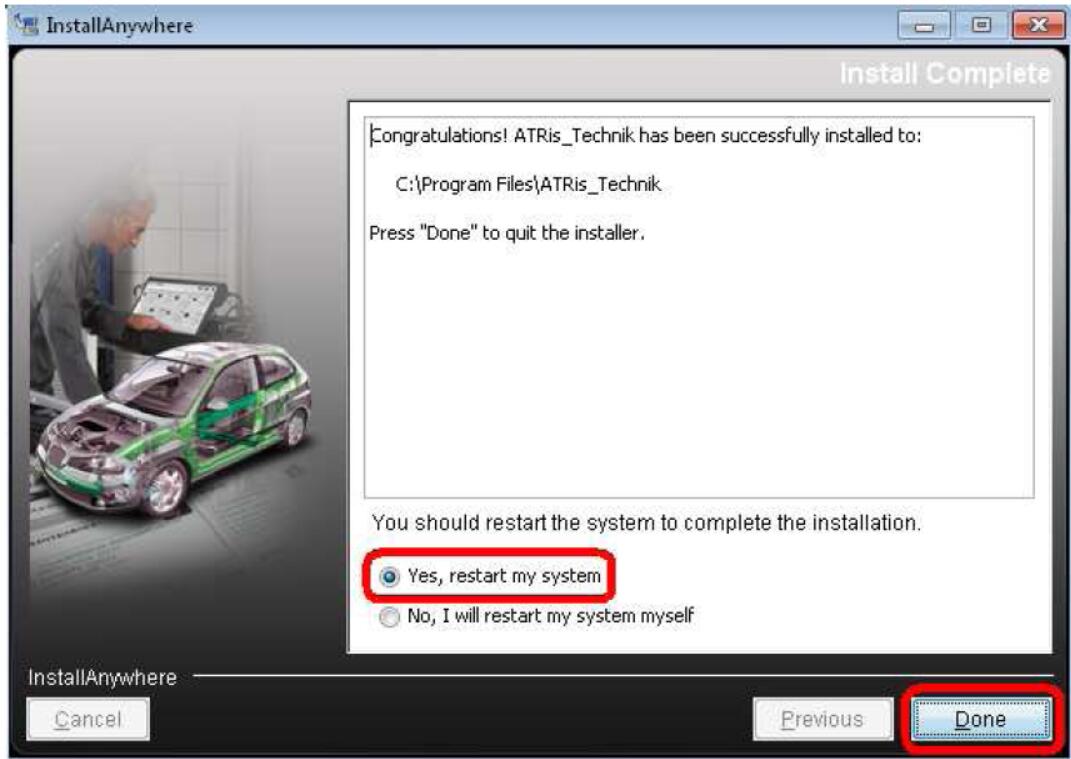
Step 19. When installation completed, select to restart your PC & click Done

How to Install ATRIS Technik 2016 Step by Step (19)

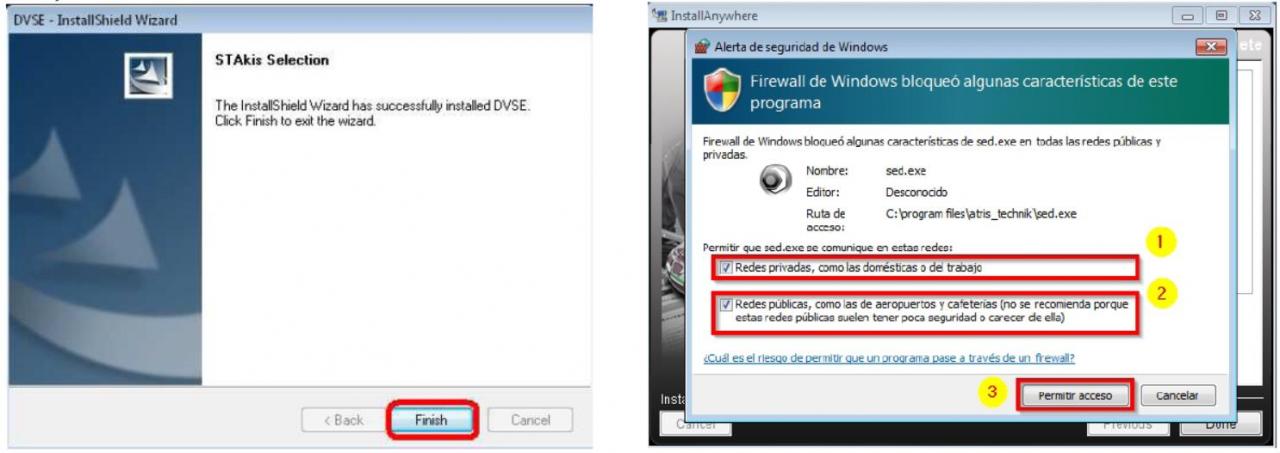
Step 20. Click in this last window Finish

How to Install ATRIS Technik 2016 Step by Step (20)

Step 21. DO NOT run the ATRIS Technik yet!

From your desktop DELETE the ATRIS Technik Shortcut!

Step 22. Use now your PREFERRED ATRIS Technik Multilanguage Patch!

Step 23. Copy/Paste the RunAsDate.exe in the the ATRIS Technik Installed

Folder (Example: C:\Program Files\ATRIS_Technik)

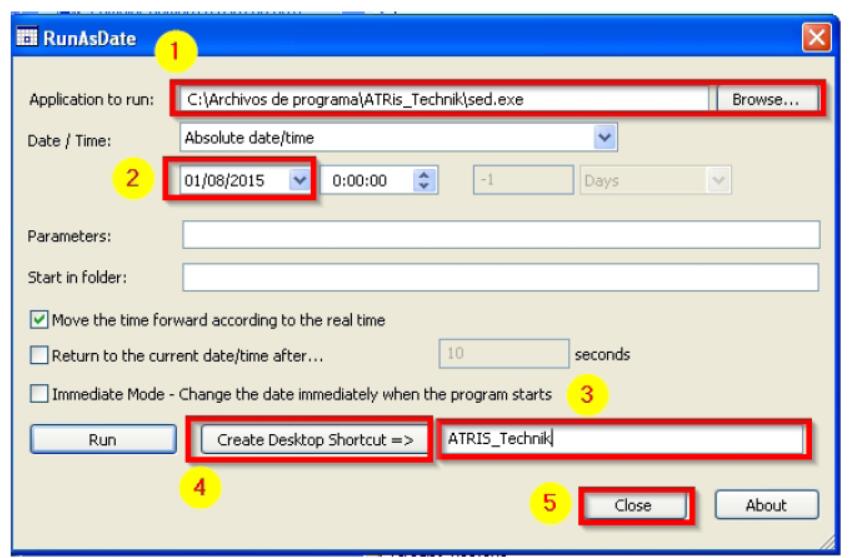
Step 24. Run now the RunAsDate.exe and Browse for to add the sed.exe on it!

Then choose for Date: 1/8/2015 and finally choose one name & create the new

Desktop Shortcut! Then close the RunAsDate.

How to Install ATRIS Technik 2016 Step by Step (21)

Step 25. Now Reboot AGAIN please your PC! (This is VERY IMPORTANT!)

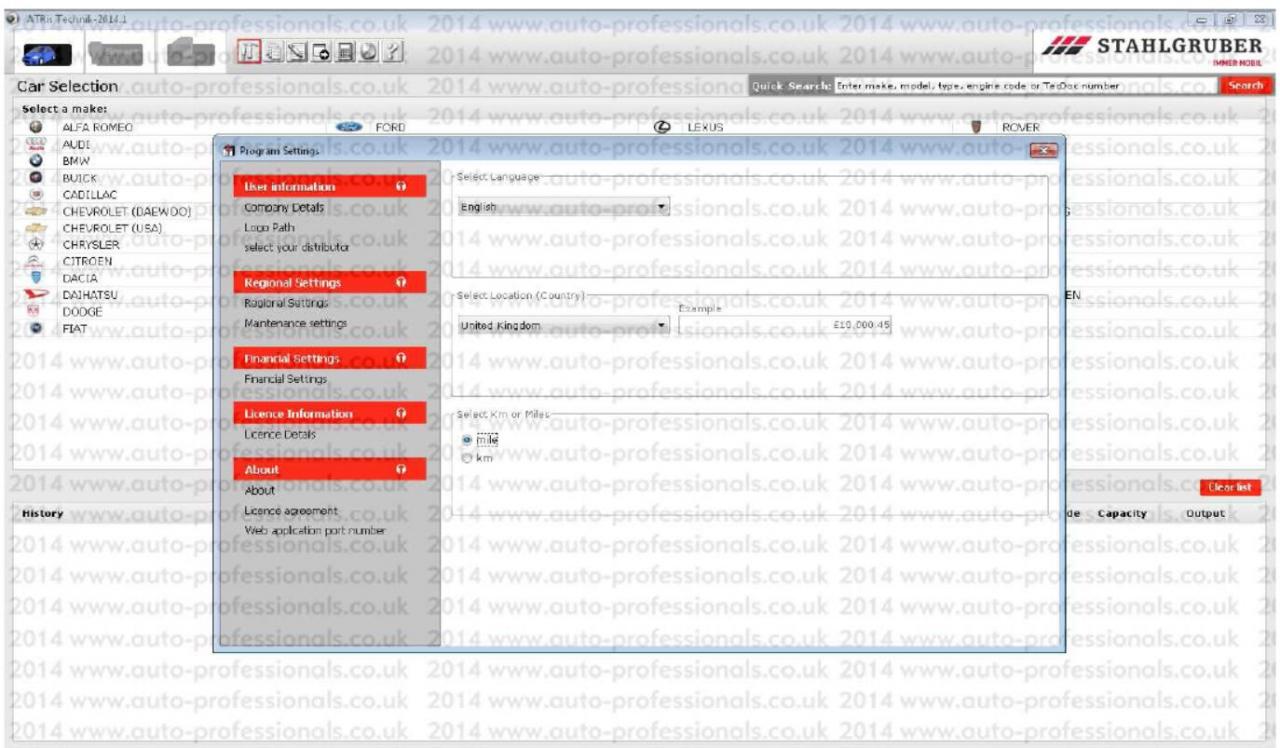
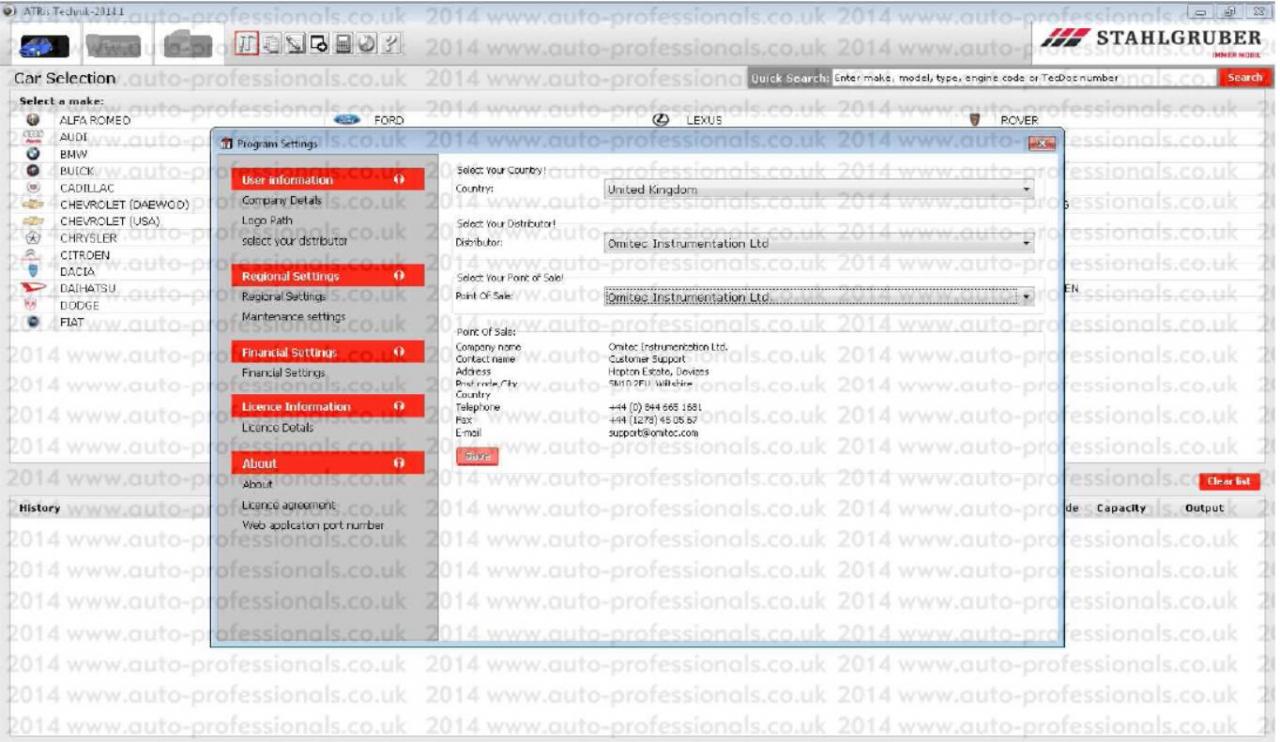
Step 26. When you log-on in your OS run from your Desktop the ATRIS

Technic and 1st of all go for to SAVE your NEW and preferred configurations!

How to Install ATRIS Technik 2016 Step by Step (22) How to Install ATRIS Technik 2016 Step by Step (23)

Step 27. Now you can Remove/Un-Install the ATRIS DVD1!

You DON

How useful was this post?

Click on a star to rate it!

Average rating / 5. Vote count:

This Post: How to Install ATRIS Technik 2016 Step by Step From ChinaOBD2 Official Blog
Please keep this link if you copy the post!

Post navigation

Prev: Prev: BMW Multi-Function Steering Wheel/Cruise Control Retrofit Guide
Next: Next: Opel Towbar and Trailer Module Coding Guide

Leave a Reply Cancel reply

Your email address will not be published. Required fields are marked *

Recent Posts

  • How to Replace U17 and L8 Components for OBDSTAR G3 Startup Failure?
  • Alientech Kess3 Adds Master TCU OBD-Bench-Boot Protocol
  • Scania Truck ALM Alarm System ALM404 Fault in the CAN Communication Solution
  • Use Xhorse MLB Tool MQB48 Adapter and Key Tool Plus in 2 Methods
  • Yanhua ACDP Module 38 Add BMW G Chassis BDC2 Key on Bench

Recommend OBD2 Scanner

ME9.7 ECU Engine Computer ME9.7 ECU Engine Computer TabScan T6PT3G Diagnosis VCI for Porsche Diagnostic Tool Porsche Diagnostic Tool

Recent Comments

  • amr on MAN EOL Flash File Editor + MAN Immo Calculator Free Download
  • Pasquale Greenwald on Jungheinrich ETM/V 10-12 Tightening Torque for Screwed Connection on Brake Systems
  • VCDS on Scania SDP3 2.53.1 Diagnosis & Programming Free Download
  • Crossley on What are the functions of Iprog+ Programmer?
  • Lukas on VAG EDC15 EDC16 IMMO OFF Software Free Download

Archives

Categories

  • BMW Diagnostic Tool
  • Car Diagnostic Tool
  • Key Cutting Machine
  • Key Programming Tool
  • MB Star Diagnosis
  • OBD2 Code Scanner
  • Tech Support
  • VXDIAG

Tags

adapter Auto Pick and Decoder Car Key Copy Car Key Programmer cat Code Reader diagnostic software ECU Chip Tunning ecu programmer Ford gm handy baby Handy Baby 2 Key Programmer Handy Baby II Key Programmer HEX V2 immo iprog key Key Pro key programmer laptop Launch lish LISHI new arrivals nexiq nexiq link diesel truck interface nexiq truck diagnostic NEXIQ USB Link OBD2 obdii original program Scania VCI smart VAG COM Cable VCDS VCDS Cable VCDS VAG COM Cable vci VW wholesale X-PROG Box X-PROG Box ECU Programmer XPROG-M

Hot Selling

  • ME 9.7 ECU Engine Computer
  • MINI VCI J2534
  • NCF29XX Programmer
  • ThinkTool Pros+

Links

  • China OBD2
  • EPS Foam Machine
  • Foxdiag
  • Сканер OBD2
©2025 OBD2 Scanner Blog | Powered by chinaobd2