Diagzone Xdiag Subscription Renew, LAUNCH LTR-01 RF Sensor, Thinkdiag Renew , Scania SDP3 Installation
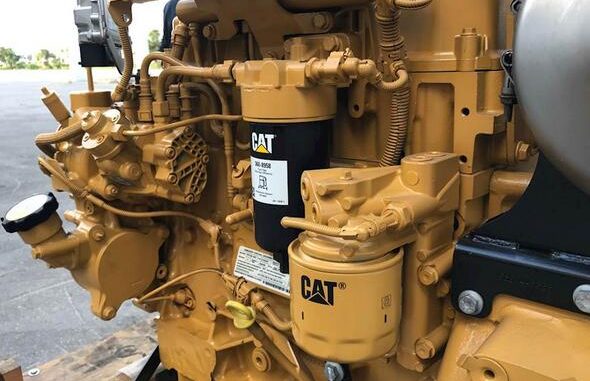
This guide details the procedure for disassembling the crankshaft on a Caterpillar C3.4B Engine used in construction equipment.
Required Tools and Equipment
Caterpillar ET Diagnostic Software
Caterpillar Factory Password Calculator
Suitable lifting gear
Tool (A) for crankshaft removal
Removal Procedure
Before beginning, ensure the engine is clean and free of dirt to prevent rapid wear and component damage.
Preparation Steps
Remove the Engine Oil Suction Pipe:
Follow the procedure outlined in “Removing and Installing the Engine Oil Pan” in the Disassembly and Assembly manual.
Remove the Balance Shaft (if necessary):
Refer to “Removing the Balancer Shaft” in the Disassembly and Assembly manual.
Remove the Flywheel Housing:
Refer to “Removing and Installing the Flywheel Housing” in the Disassembly and Assembly manual.
Remove the Front Housing Shell:
Follow the procedure in “Housing (Front) – Disassembly” in the Disassembly and Assembly manual.
Remove the Drive Power Output Unit (if necessary):
Refer to “Output Drive – Removal and Installation” in the Disassembly and Assembly manual.
Remove the Cylinder Head (if necessary):
Follow the procedure in “Removing the Cylinder Head” in the Disassembly and Assembly manual.
Remove the Pistons and Connecting Rods (if necessary):
Refer to “Piston and Linkage Removal” in the Disassembly and Assembly manual.
Remove the Main Bearing Cover:
Follow the procedure in “Crankshaft Main Bearing – Removal and Installation” in the Disassembly and Assembly manual.
Crankshaft Removal
Mount the Motor:
Position the motor upside down on a suitable workbench.
Remove Connecting Rod Bearings:
If the cylinder head, pistons, and connecting rods are still installed, remove the connecting rod bearings. Refer to “Removing the Connecting Rod Bearings” in the Disassembly and Assembly manual.
Lift the Crankshaft:
Attach tool (A) and suitable lifting gear to the crankshaft (2).
Carefully lift the crankshaft out of the cylinder block. The crankshaft weighs approximately 35 kg (77 lbs).
Note: Avoid scratching the surface of the crankshaft. Once removed, support the crankshaft on a suitable workbench to prevent damage.
Remove Main Bearings:
Follow the procedure in “Crankshaft Main Bearings – Removal and Installation” in the Disassembly and Assembly manual.
Note: The main bearing shaft features grooves and oil holes.
Remove Crankshaft Timing Ring (if necessary):
Refer to “Crankshaft Timing Ring Removal and Installation” in the Disassembly and Assembly manual.
Final Steps
After disassembling the crankshaft, ensure all components are clean and free from dirt to prevent rapid wear. For more detailed procedures and additional support, consult the Caterpillar ET Diagnostic Software and the respective sections in the Disassembly and Assembly manual.
Additional Resources
For more information and to download necessary diagnostic tools and software, visit:
Caterpillar ET Diagnostic Software:
Download and Installation for 2024A, 2023C, and 2019C versions
Caterpillar Factory Password Calculator:
One Time Calculation Service
By following this guide, you can efficiently disassemble the crankshaft of a Caterpillar C3.4B Engine, ensuring proper handling and maintenance of your construction equipment.
Related posts:
How to View and Clear Active Diagnostic Codes by Cat ET 2023C
Installation Guide for Oil-Water Separator and Fuel Filter on Caterpillar 311F LRR JFT Excavator
Best Quality 2021B CAT Caterpillar ET 3 Diagnostic Adapter III CAT ET Diagnostic Tool PLUS Lenovo X220 Laptop With WIFI
After device connected with Vehicle,the CAT ET 3 main unit light is off and cannot work normally
How useful was this post?
Click on a star to rate it!
Average rating / 5. Vote count:
Please keep this link if you copy the post!
