Diagzone Xdiag Subscription Renew, LAUNCH LTR-01 RF Sensor, Thinkdiag Renew , Scania SDP3 Installation
Here is the instruction show you guide on how to perform timing setting for CLAAS AXION 950 tractor.
Related Contents:
CLAAS CDS 7.5 Diagnostic Software 2021 2020 Free Download
CLAAS 4x CAN Diagnostic Interface
Claas WebTIC Offline Repair & Service 2024 2015 Free Download
Procedures:
Setting the timing
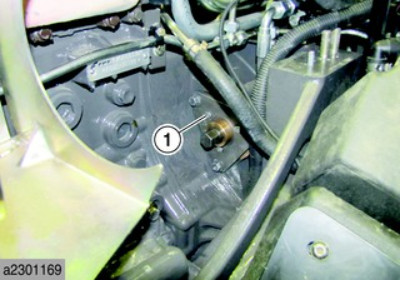
► Remove the electric starting motor.
► Fit the special tool (1).
Fitting the camshaft timing tool
► Remove the fan.
► Remove the thermostat casing.
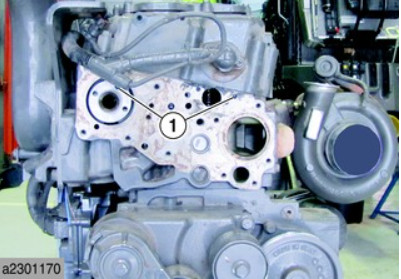
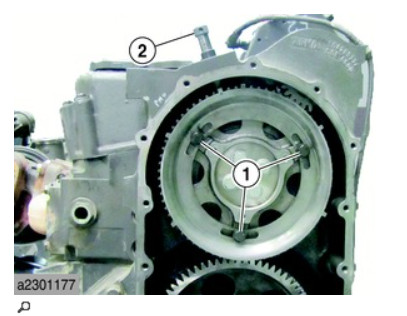
► Turn the engine flywheel with the special tool so that it can be placed in the holes (1).
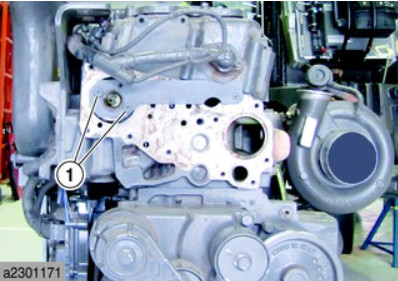
► Fit the special tool.
► Fit two bolts at (1).
Fitting the crankshaft timing tool
► Time the camshaft.
► Remove the exhaust pipe.
► Remove sensor “B231”.
Before working on the timing, mark the hole through which the two-slot mark can be seen (1) on the flywheel (two types of fitting) when the camshaft is timed.
► Scenario 1: it is visible through the hole on sensor “B231” (3).
► Scenario 2: it is visible through the hole under the flywheel bell housing (2).
To check scenario 2.
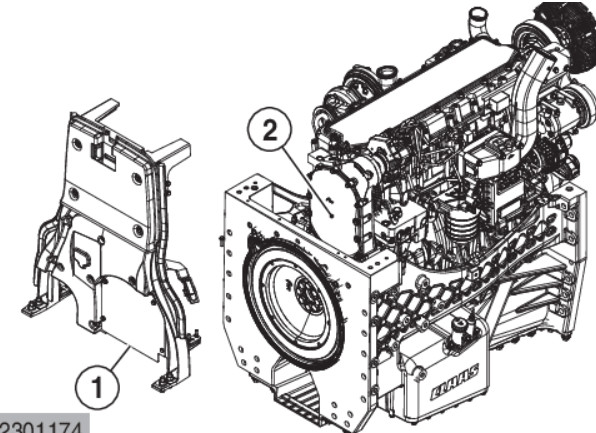
► Remove the stiffener panel.
Remove the transmission shaft.
The position of the mark and the timing tool must be the same when the timing is set. It represents the timing position of the flywheel.
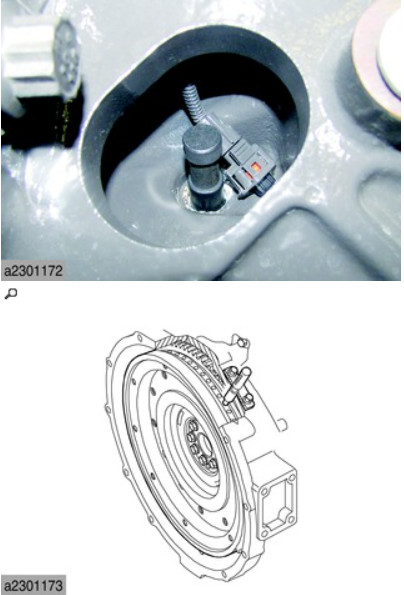
► Fit the special tool into position on sensor “B231”; it should be slotted into the housing in the flywheel.
Fitting the timing tool for the sensor “B054” target
To time the target of sensor “B054”, the crankshaft and camshaft must be timed.
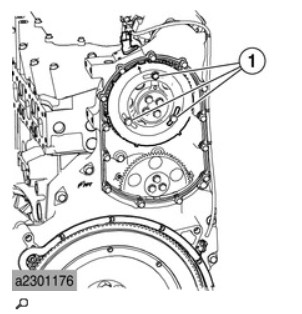
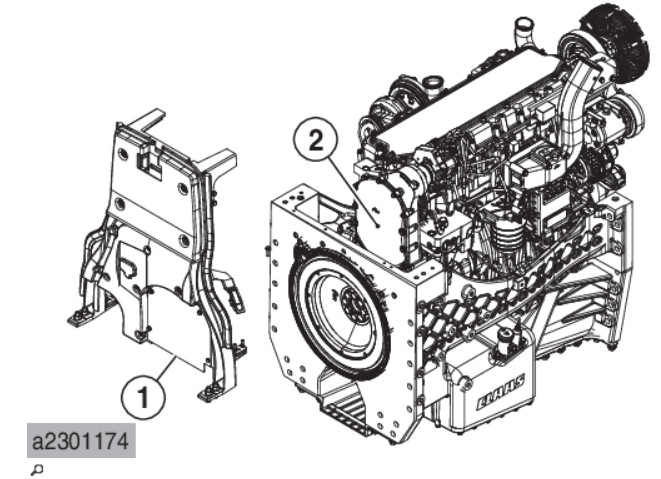
► Remove the access panel (1).
► Remove the engine panel (2).
► Remove the centrifuge oil vapour filter.
Remove sensor “B231”.
► Fit the special tool (2) in the housing on sensor “B054”.
The special tool must be positioned on the tooth marked by the arrow.
If the special tool is not positioned on the tooth marked by the arrow.
► Undo the mounting bolts (1).
► Move the target so that the marker (3) and the special tool n o 00 1143 536 0 are lined up.
► Tighten the mounting bolts (1).
Removing the timing setting tools
► Remove the three timing setting tools.
► Turn the engine twice using the special tool.
► Fit the crankshaft timing tool.
► Check that the timing tools for the sensor B054 target and the camshaft can be easily fitted.
► Fit the centrifuge oil vapour filter.
► Fit the engine panel (2).
► Fit the access panel (1).
► Fit the sensor “B231”
► Fit the sensor “B054”.
► Fit the exhaust pipe.
► Fit the thermostat casing.
► Fit the fan.
More repair case for CLAAS,please refer to CLAAS Trouble Repair
How useful was this post?
Click on a star to rate it!
Average rating / 5. Vote count:

Some Friends don't know how to activate win7, when they receive the diagnostic software with win7 sytem. http://www.chinaobd2.com/upload/software/win7activation.zip download this Read more

Please ensure that you choose computer systems that meet our requirements for the installation. You will find adetailed listing in Read more

Frequent oil changes are perhaps the most important procedure you can do to maintain and prolong the life of your Read more

Please keep this link if you copy the post!