Diagzone Xdiag Subscription Renew, LAUNCH LTR-01 RF Sensor, Thinkdiag Renew , Scania SDP3 Installation
This instruction show you guide on how to disassembly and assembly fuel injector for Bobcat 3450 utility vehicle.
Related Contents:
Bobcat 3450 Utility Vehicle Fuel Injector Removal and Installation Guide
Bobcat Service Analyzer 90.00 89.06 Diagnostic Software Free Download
Procedures:
Fuel Injector Disassembly
NOTE: Never use a steel wire brush to clean fuel injectors. Damage to the nozzle and other
components is likely to result.
Clean carbon from used injectors using clean diesel fuel.
Hardened deposits or varnish can be cleaned using a brass wire brush.
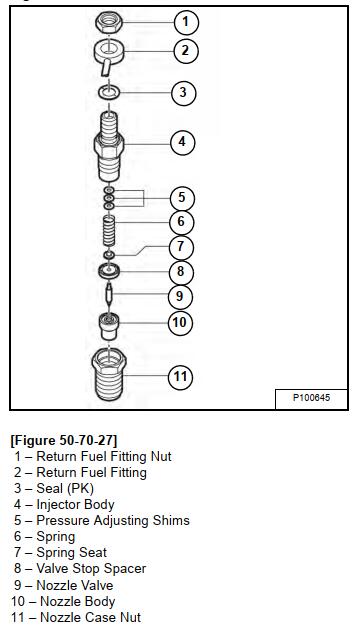
Place the fuel injector in a soft-jawed vise with the nozzle pointing up.
Remove the nozzle case nut.
Carefully remove the injector from the vise.
Turn the injector over and remove the nozzle body, nozzle valve, valve stop spacer, nozzle spring seat, nozzle spring and shims.
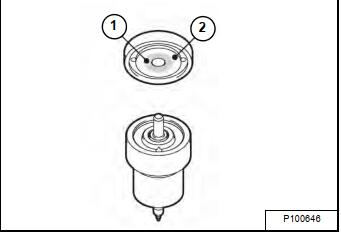
Inspect the sealing surfaces (Item 2) between the valve stop spacer and nozzle body for nicks
or scratches. Check the contact area between the valve stop spacer and the nozzle valve (Item 1) for scoring or pitting. Use a magnifying glass to inspect.
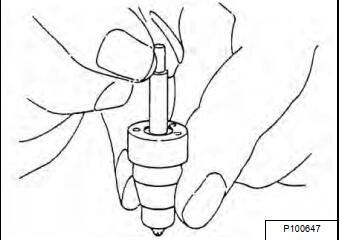
Perform a nozzle valve slide test:
(a) Wash nozzle body and valve in clean diesel fuel.
(b) While holding the nozzle body vertical, pull the nozzle valve about 2/3 of the way out.
(c) Release the valve. It should fall smoothly to its seat by its own weight.
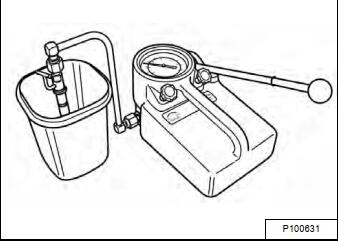
NOTE: Replace the fuel injector assembly if it fails any inspection or if an injector tester is not available.
Fuel Injector Assembly
Secure the injector in a soft-jawed vise with the nozzle end up.
Install the shims, nozzle spring, nozzle spring seat, valve stop spacer, nozzle valve and nozzle body.
Install the nozzle case nut. Tighten to 49
How useful was this post?
Click on a star to rate it!
Average rating / 5. Vote count:
Please keep this link if you copy the post!
